
This post may contain affiliate links. Read our privacy policy.
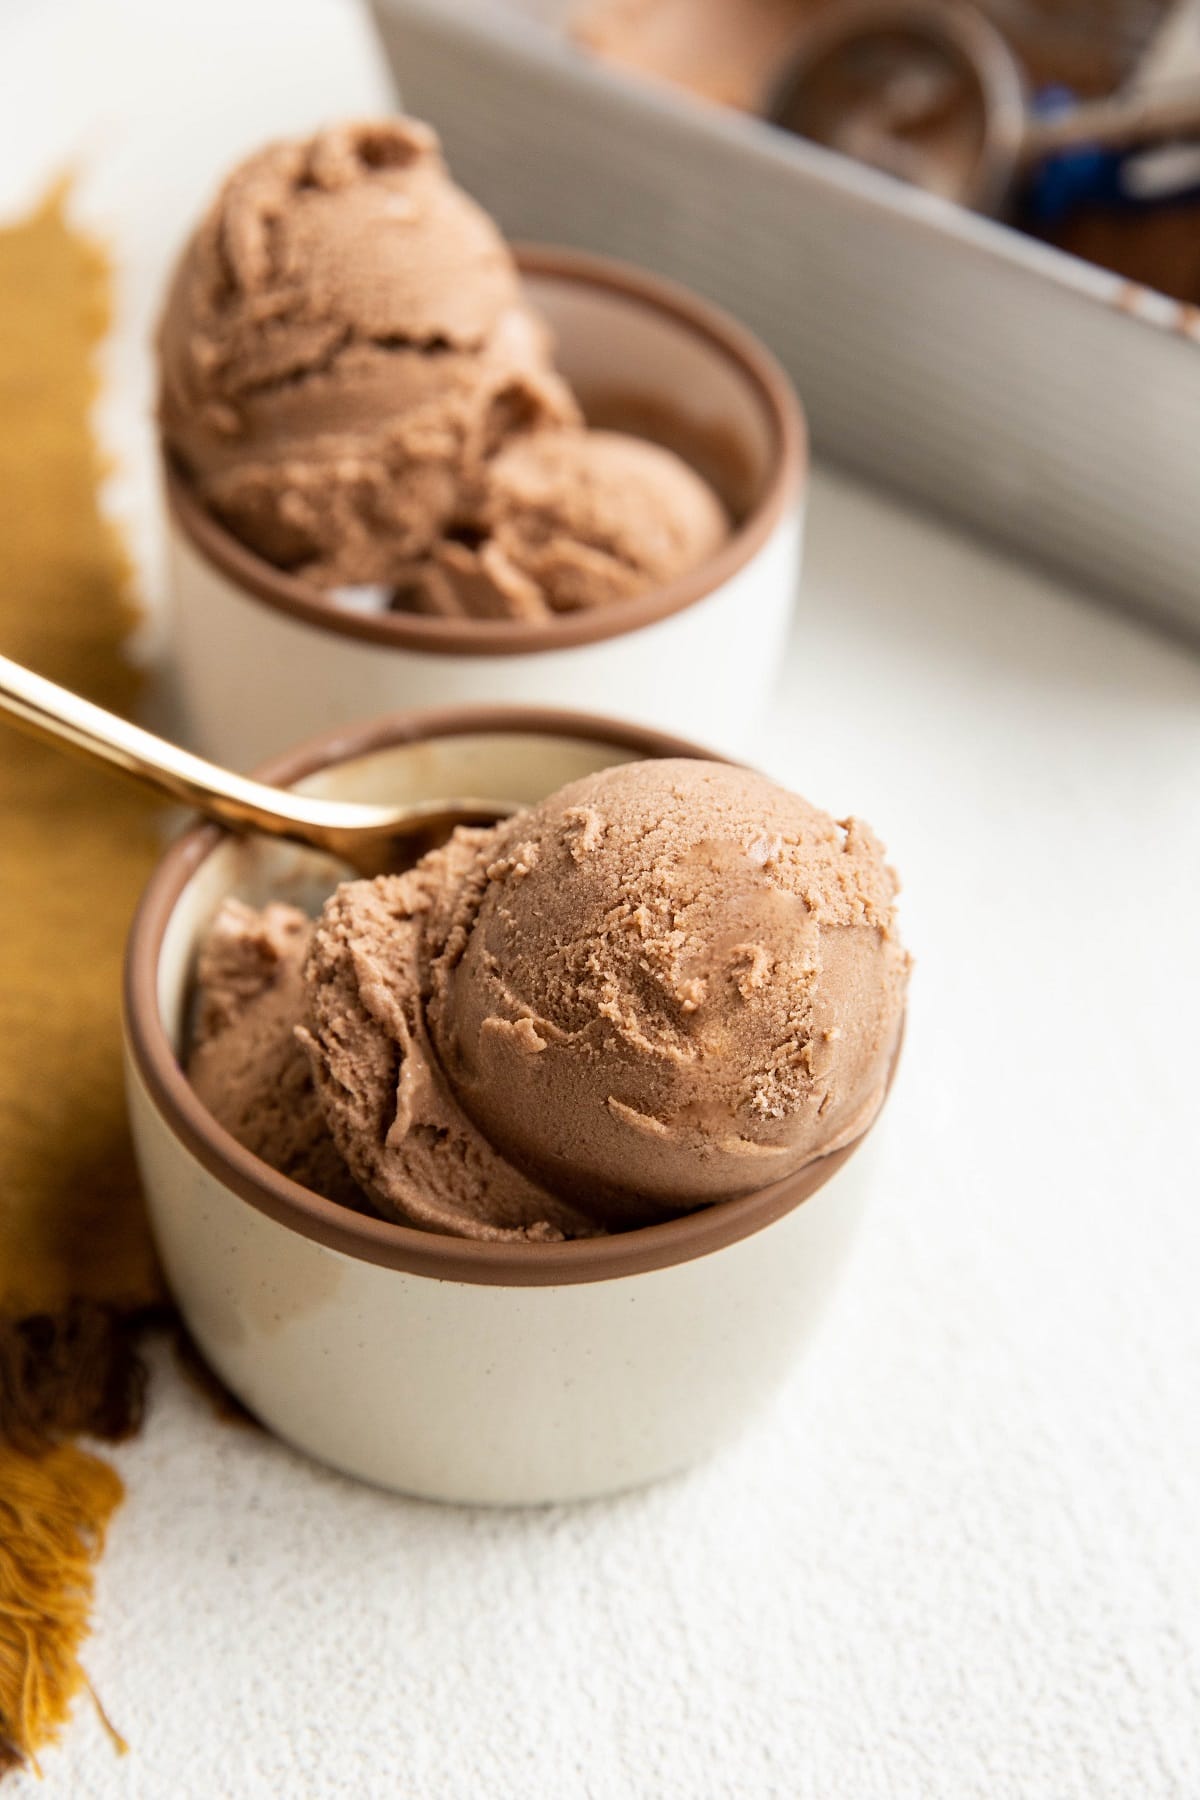
The best Dairy-Free Chocolate Ice Cream recipe that is so rich and creamy, perfectly sweet and chocolatey. This simple 4-ingredient chocolate ice cream can be prepared without an ice cream maker.
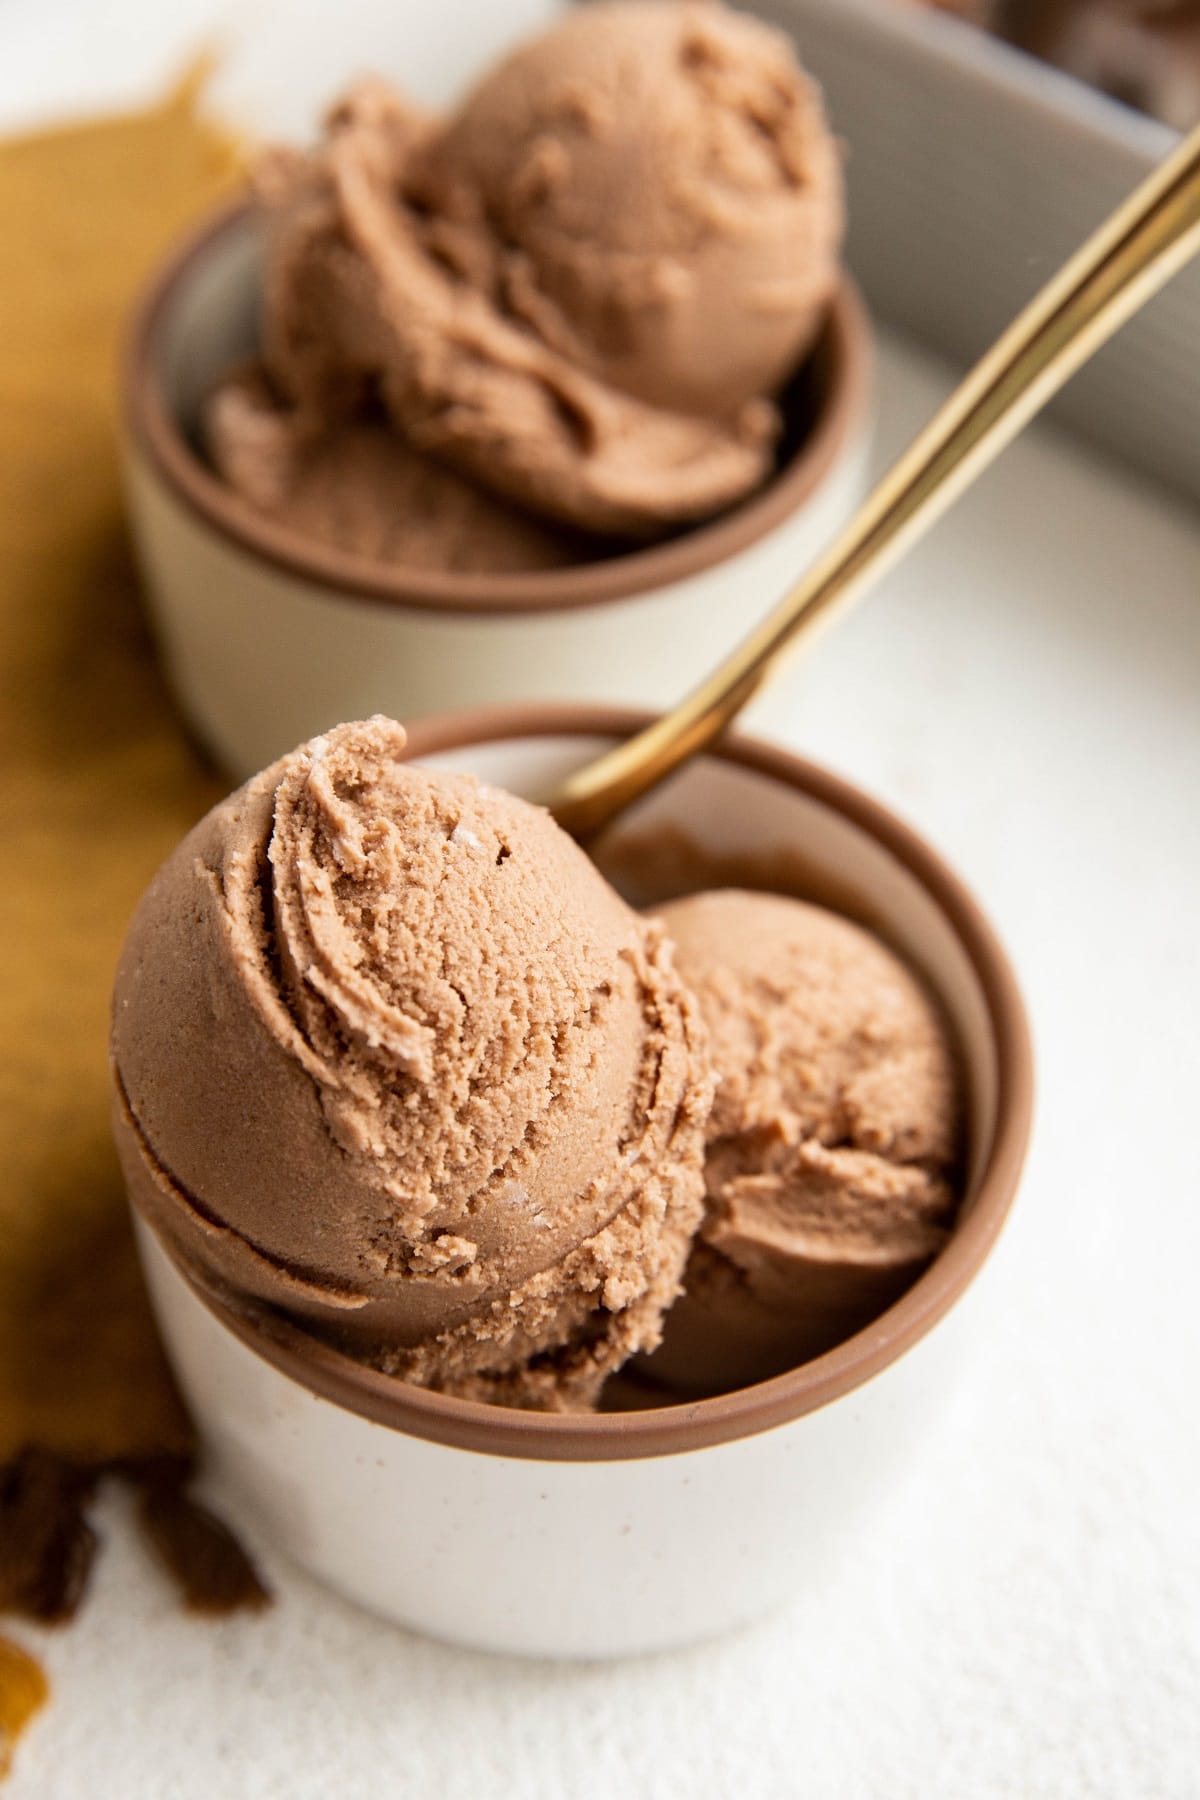
Looking for a delicious dairy-free chocolate ice cream that you’ll return to over and over? I humbly present to you what I consider to be the absolute best homemade chocolate ice cream.
It’s rich and creamy with a soft texture, includes just the right amount of chocolate flavor and sweetness, and requires zero fancy maneuvers to prepare.
While you can make this a no-churn chocolate ice cream by skipping the ice cream machine step, I do recommend using your ice cream maker if you have one. It simply adds a fluffy airiness, which is incredible if you enjoy chocolate soft serve.
Canned full-fat coconut milk does much of the heavy lifting in this recipe, as it is what is responsible for the rich flavor and creamy texture.
I will say, the type of canned coconut milk you use in this ice cream is very relevant to the results, so I cover my recommended brands in the ingredients section below.
If you’re looking for traditional ice cream that uses heavy cream or dairy products, make my 4-Ingredient No-Churn Chocolate Ice Cream.
Let’s discuss the simple ingredients list in detail so that you end up with the best vegan chocolate ice cream recipe.
Ingredients For Dairy-Free Chocolate Ice Cream:
Full-Fat Canned Coconut Milk: The true star of this incredibly rich and creamy chocolate ice cream recipe is full-fat canned coconut milk.
The brand of coconut milk does make a difference as there is a wide range of quality when it comes to coconut milk.
My top two recommendations are Native Forest Classic Coconut Milk and the Whole Foods 365 Coconut Milk. Sticking with a trusted quality brand of organic coconut milk will ensure the best texture. There are many quality brands out there!
I don’t recommend using the Goya brand because the texture never seems to turn out right.
If you can find canned coconut cream, feel free to use 2 (15-oz) cans of coconut cream instead.
In addition, I recommend using a brand of coconut milk that does contain emulsifiers and guar gum, as these ingredients are what bring the smooth texture to the ice cream.
Be sure you’re picking up full-fat canned coconut milk, not light canned coconut milk. I want to emphasize that the coconut milk should also come in a can, not in a carton.
The cartons of coconut milk contain far less fat than canned coconut milk, which results in an icy texture. Similarly, all other plant based milks will turn out icy so I don’t recommend making substitutions here.
Pure Maple Syrup: In order to keep the ice cream refined sugar-free, I use pure maple syrup to sweeten it. If you prefer using a sugar-free sweetener for a low carb option or granulated cane sugar, feel free to make the switch in a 1:1 replacement.
Cocoa Powder: The chocolate portion of this delicious chocolate ice cream recipe is unsweetened cocoa powder. I like using raw cacao powder because it has a creamier, less bitter flavor, but feel free to go with any cocoa powder you use regularly and love.
For deep chocolate flavor, you can absolutely add 1 to 3 additional tablespoons of cocoa powder.
Vanilla Extract: While optional, a little vanilla extract goes a long way in creating a nice warm balance to the chocolate flavor. Skip it if you don’t have it on hand.
Sea Salt: A pinch of sea salt makes this homemade ice cream recipe taste even richer! It enhances the sweetness, richness, and chocolate flavors. Don’t skip it!
Want to get creative with this creamy ice cream recipe? Here are some suggestions.
Optional Additions:
- For more chocolate flavor, make my Dairy-Free Chocolate Ganache and swirl it into the ice cream while it is churning in the ice cream maker.
- Add ⅔ cup of mini chocolate chips or chopped chocolate chunks for some texture.
- If you love the combination of chocolate and caramel, make my Paleo Salted Caramel to swirl throughout the ice cream or to drizzle on top.
- Add 1 cup of mini marshmallows and ⅔ cup of raw chopped walnuts for rocky road ice cream.
- Mix in 1/3 to 1/2 cup of creamy peanut butter for some peanut butter action.
What Can I Use Besides Coconut Milk?:
For the best results, I recommend sticking with the recipe as written without making substitutions to the full-fat canned coconut milk.
This advice comes from years of experience trying various combinations of dairy-free milks to try to lower the calorie count of the ice cream.
My general take is if you’re looking for rich and creamy chocolate ice cream, you may as well swim if you’re going to get wet.
I will say, my Chocolate Banana Ice Cream recipe is pretty phenomenal if you enjoy bananas. It is much lower in fat and lower in calories, still has big chocolate flavor and is also easy to make in a blender (no ice cream maker needed).
If you’re looking for a dairy-free chocolate ice cream recipe that doesn’t use full-fat canned coconut milk, I would recommend finding a different recipe altogether. Here’s why.
Because non-dairy milks like almond milk, cashew milk, and oat milk are very low in fat relative to canned coconut milk, you will need to also include egg yolks to add creamy texture and fat. Otherwise, homemade dairy-free ice creams with lower fat plant milks can turn out very icy and lacking in flavor.
I’ve found most people don’t want to take the time to temper egg yolks or they are afraid of messing it up, so I generally make most of my non-dairy ice creams without eggs.
Now that we’ve covered the ingredients for dairy-free chocolate ice cream as well as my disclaimers, let’s make it!
How to Make Dairy-Free Chocolate Ice Cream:
Freeze the bowl of your ice cream maker at least 12 hours (ideally 24 hours or longer) before making the ice cream. If you don’t own an ice cream machine, skip this step.
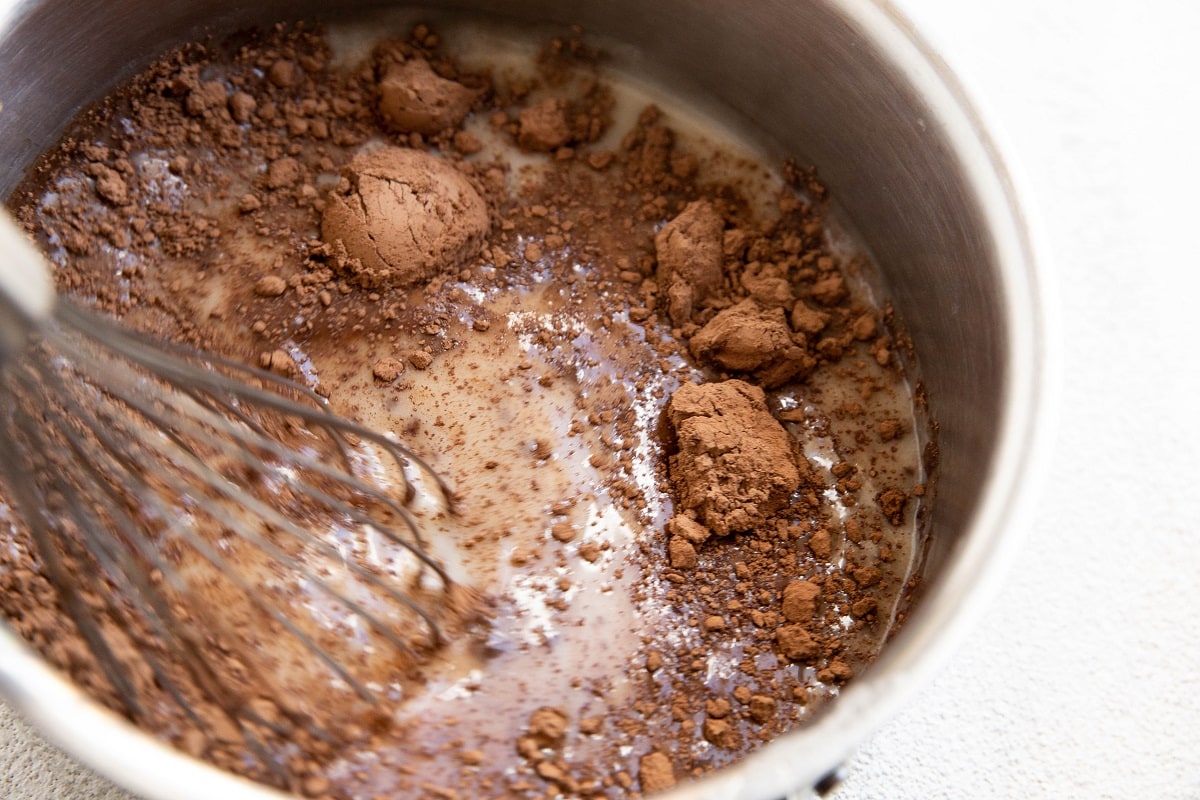
Add the canned coconut milk and pure maple syrup to a saucepan and heat it over medium heat on the stove top. Stir and heat until the coconut milk is completely creamy. If your house is on the chilly end, there will be separation between the cream and water. We want the milk to be well-combined.
Once the coconut milk and pure maple syrup are combined, whisk in the cocoa powder and sea salt. Continue whisking and heating until the cocoa powder has dissolved.
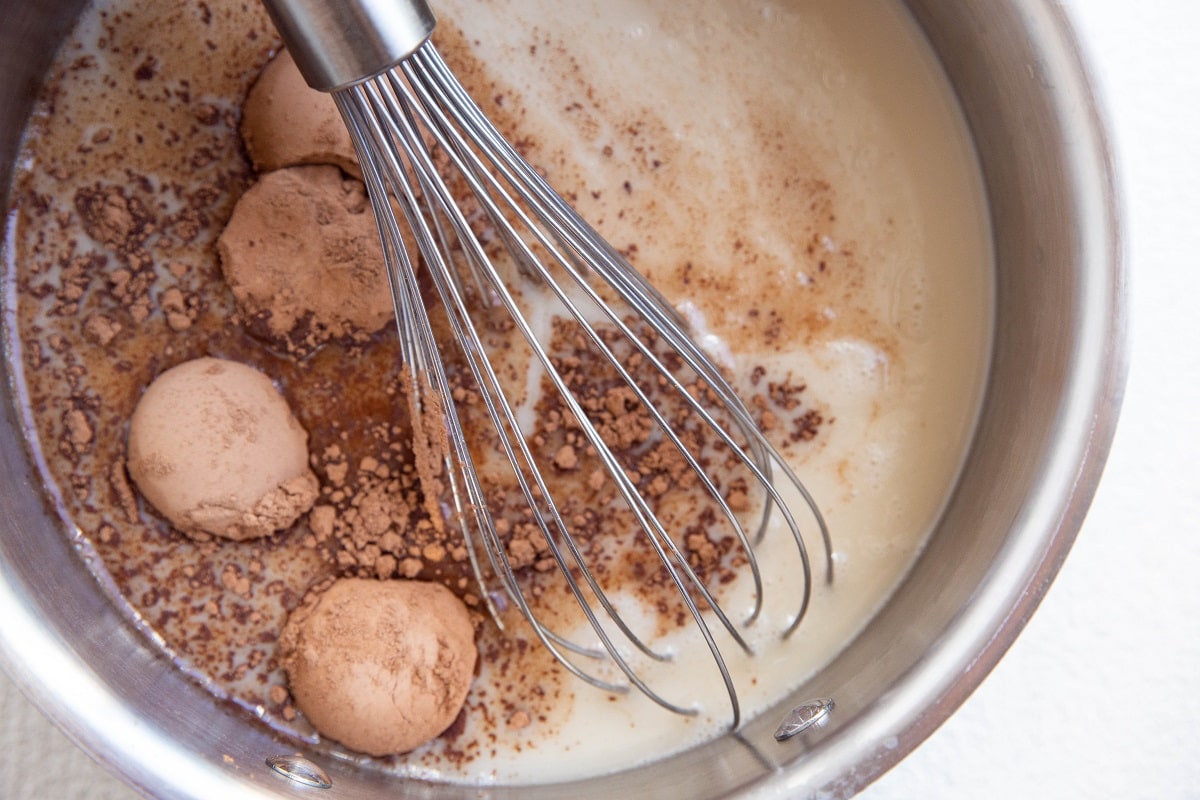
It’s fine if there are a few small chunks of cocoa powder left but whisk assertively to get most, if not all, of the cocoa powder to dissolve.
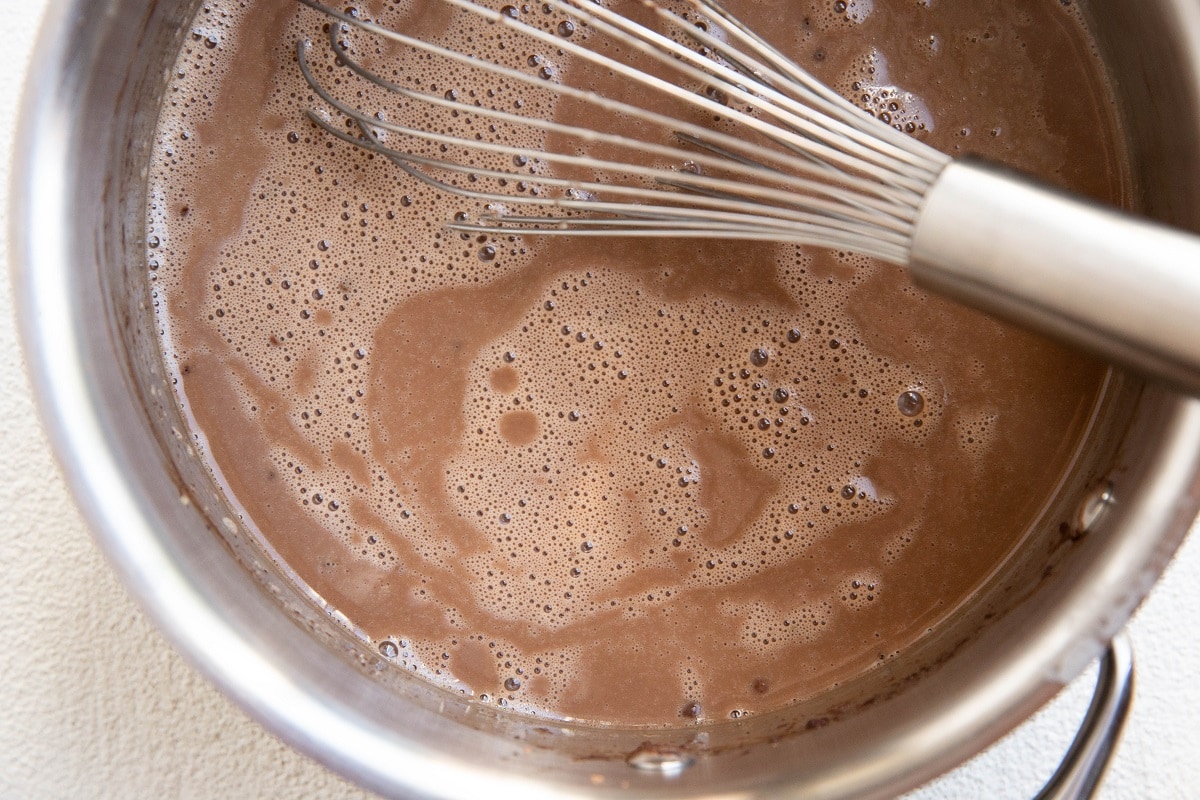
Once the cocoa powder has dissolved, remove the saucepan from the stove top and whisk in the vanilla extract.
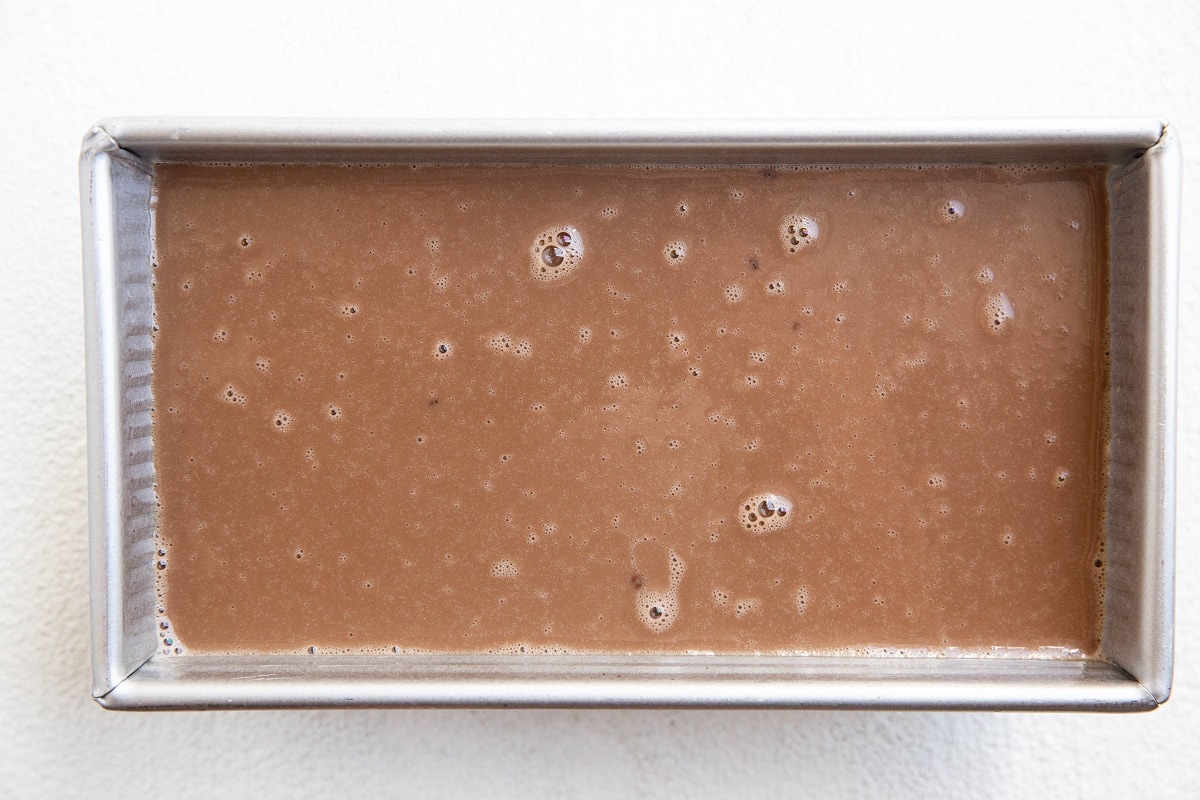
Transfer the ice cream base to a freezer-safe container such as a tupperware dish or large bowl and refrigerate until completely chilled. You can speed up this process by freezing the ice cream base and stirring it every 10 minutes or so until it’s cold.
Note: If you aren’t using an ice cream machine to prepare the recipe, simply transfer the ice cream base to a freezer-safe container (a loaf pan covered with plastic wrap works or a freezer safe tupperware container with a lid), then freeze until solid.
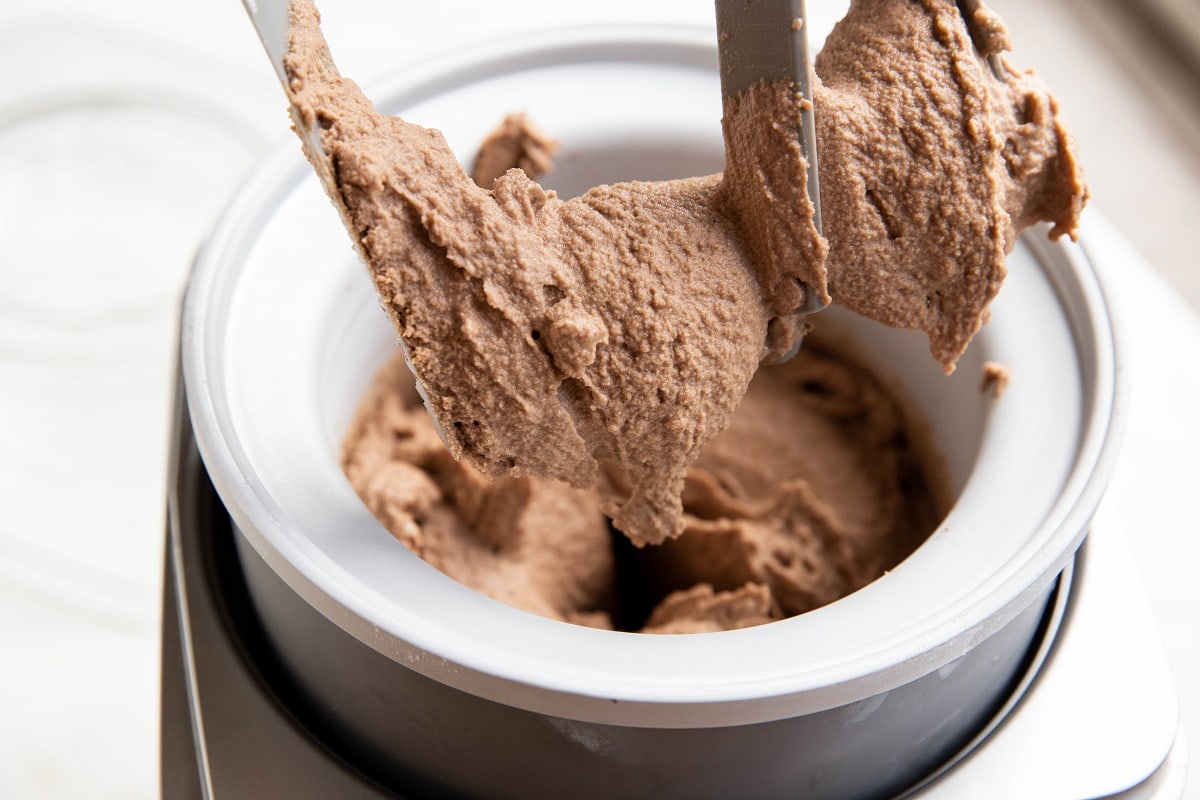
When you’re ready to make chocolate ice cream, plug in your ice cream maker and place the frozen bowl inside. Pour in the chocolate ice cream base, insert the paddle, and secure the lid (or follow the instructions on your specific ice cream maker).
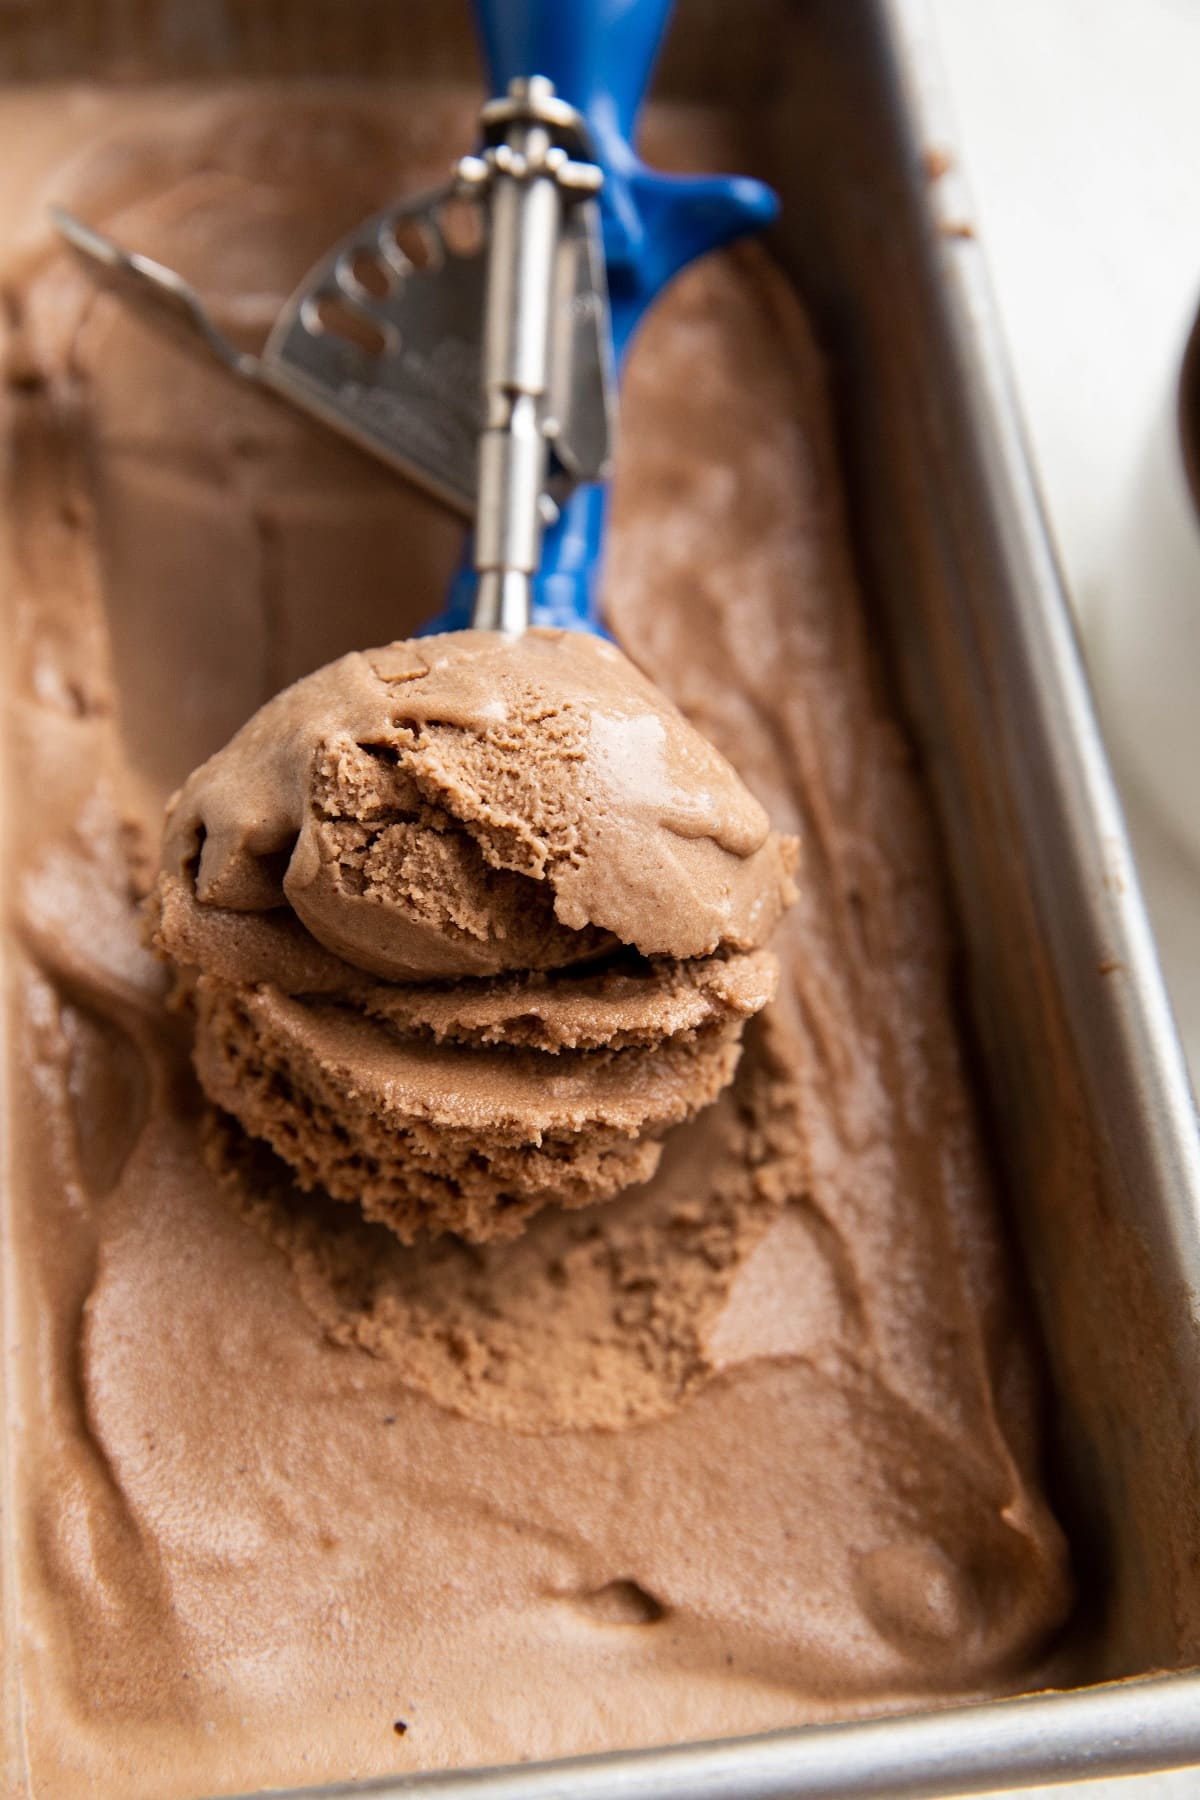
Turn the ice cream maker on and allow it to churn until the ice cream is thick and the maker begins to bog down slightly. This takes about 15 to 20 minutes for me.

Serve ice cream immediately for a soft serve consistency. To be honest, I typically stop here and just enjoy it as soft serve ice cream due to how luscious and creamy it is.
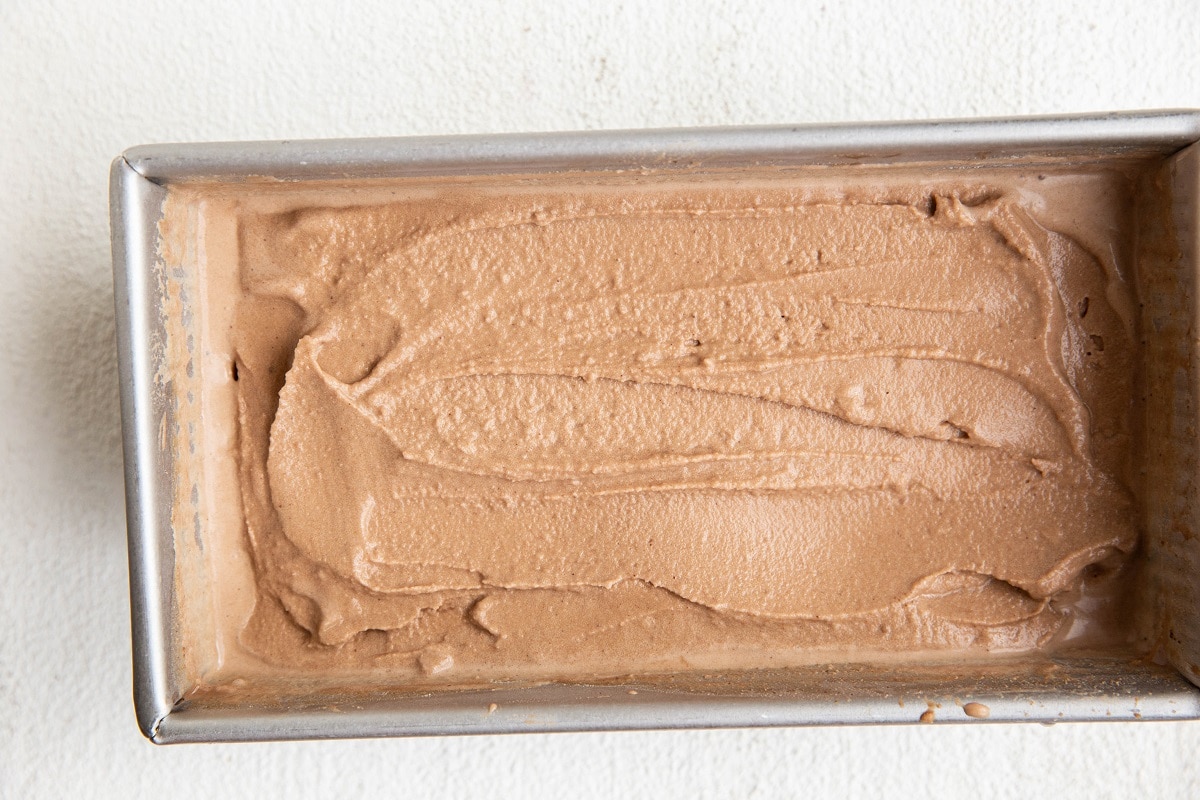
For regular ice cream consistency, transfer the ice cream to an airtight container (many people use a loaf pan or a tupperware container) and freeze until it has completely set up, about 4 to 8 hours.
When you’re ready to eat the ice cream, allow it to thaw at room temperature before you attempt to scoop it. Coconut milk ice creams take much longer to thaw than regular ice cream so have patience while it does its thing.
Scoop ice cream into bowls and enjoy! You can add any ice cream toppings to your heart’s delight.
Store ice cream in an airtight container in the freezer for up to 3 months.
What Type of Ice Cream Maker to Use:
I haven been using the Cuisinart Ice Cream Maker for ten years and I absolutely love it. It’s easy to use, easy to clean, and does an incredible job of churning an amazing ice cream.
I have recommended this exact ice cream maker countless times over the years!
If you use a different brand that you love, feel free to drop it in the comments below so that others can pick and choose what ice cream maker to buy if they don’t already own one.
And that’s it! Every detail you need to know about making this delicious homemade chocolate ice cream recipe. A vanilla ice cream recipe is already in the works for my vanilla lovers.
The way I see it, this rich chocolate ice cream is an amazing project for kids of all ages when the whole family is craving a sweet treat. Because there are no artificial sweeteners, colors, or high fructose corn syrup, you can feel confident you’re whipping up a cleaner treat.
If you’re looking for more dairy-free ice cream recipes, also check out these gems!
More Dairy-Free Ice Cream Recipes:
- Banana Chickpea Ice Cream
- Paleo Mint Chocolate Chip Ice Cream
- Paleo Coffee Ice Cream
- Vegan Key Lime Ice Cream
- Dulce de Leche Ice Cream
- Roasted Strawberry Coconut Milk Ice Cream
- Banana Nice Cream
Chocolate lovers, enjoy this sultry treat! Let me know what additions you make (if any) in the comments below!
Dairy-Free Chocolate Ice Cream

Ingredients
- 2 (15-oz) cans full-fat coconut milk
- 3/4 cup pure maple syrup
- 4 Tbsp unsweetened cocoa powder*
- 1 tsp pure vanilla extract
- ¼ tsp sea salt
Instructions
- Freeze the bowl of your ice cream maker at least 12 hours (ideally 24 hours or longer) before making the ice cream. Skip this step if you don’t own an ice cream machine.
- Add the canned coconut milk and pure maple syrup to a saucepan and heat it over medium heat on the stove top. Stir and heat until the coconut milk is completely creamy. If your house is on the chilly end, there will be separation between the cream and water. We want the milk to be well-combined.
- Once the coconut milk and pure maple syrup are combined, whisk in the cocoa powder and sea salt. Continue whisking and heating until the cocoa powder has dissolved. It’s fine if there are a few small chunks of cocoa powder left but whisk assertively to get most, if not all, of the cocoa powder to dissolve.
- Once the cocoa powder has dissolved, remove the saucepan from the stove top and whisk in the vanilla extract.
- Transfer the ice cream base to a freezer-safe container such as a tupperware dish or large bowl and refrigerate until completely chilled. You can speed up this process by freezing the ice cream base and stirring it every 10 minutes or so until it’s cold. Note: If you aren’t using an ice cream machine to prepare the recipe, simply transfer the ice cream base to a freezer-safe container, then freeze until solid.
- When you’re ready to make chocolate ice cream, plug in your ice cream maker and place the frozen bowl inside. Pour in the chocolate ice cream base, insert the paddle, and secure the lid (or follow the instructions on your specific ice cream maker). Turn the ice cream maker on and allow it to churn until the ice cream is thick and the maker begins to bog down slightly. This takes about 15 to 20 minutes for me.
- Serve ice cream immediately for a soft serve consistency. To be honest, I typically stop here and just enjoy it as soft serve ice cream due to how luscious and creamy it is. For regular ice cream consistency, transfer the ice cream to an airtight container (many people use a loaf pan or a tupperware container) and freeze until it has completely set up, about 4 to 8 hours.
- When you’re ready to eat the ice cream, allow it to thaw at room temperature before you attempt to scoop it. Coconut milk ice creams take much longer to thaw than regular ice cream so have patience while it does its thing.
- Scoop ice cream into bowls and enjoy! You can add any ice cream toppings to your heart’s delight.
Notes
Nutrition
Nutrition information is automatically calculated, so should only be used as an approximation.
Like this recipe? Rate and comment below!
This post contains affiliate links, which means I make a small commission off items you purchase at no additional cost to you.


Nice
Julia, this hit the spot! Hubs and I are dairy free and “needed” some chocolate ice cream therapy, and this is it! I used 2 cans of coconut cream, and it is just wonderful! Thank you!!
Aww I’m thrilled to hear it worked out so well for you guys, Maren! Thank you for the sweet note!
Hi Julia. I found your recipe because my girlfriend in on a dairy-free, sugar-free diet at the moment. So thank you for this!
Two questions:
I have a never-used 1.5 quart ice cream maker. Will it accommodate these ingredients at these portions?
You mention coconut cream in this and other recipes as an option over coconut milk. But you don’t say much about it. I have easy access to that. How will it change the consistency and/or flavor?
Thanks much.
Hi Michael! My pleasure! To answer your questions –
1.) A 1.5-quart ice cream maker might be a touch small. I use a 2 quart (https://amzn.to/3yDoUjf) and it doesn’t fill up all the way but it does need some room at the top to churn the ice cream base. If 1.5 is what you have, you could try halving the ice cream base and churning it in two batches. Kind of a pain, but I’m just not sure whether or not 1.5 quarts is large enough.
2.) I love using coconut cream for ice cream! The main difference between coconut cream and coconut milk is the fat content. Coconut cream contains more fat, which makes a richer, smoother ice cream. If you have easy access to it and you don’t mind the extra calories, I support the coconut cream 🙂
Let me know if you have any other questions! xo
Thanks, Julia. Calories be damned when it comes to ice cream.
By the way, with “shrinkflation,” the canned milk you link to is now down from 15 oz to 13.5 oz. Same with the Whole Foods brand. Just FYI. Grrrrr.
Agh, thanks for letting me know, Michael!! And I feel the same way about ice cream 😉 xo