Learn how brew kombucha at home using a SCOBY and black tea. Complete with instructions on how to properly do a secondary fermentation. Rejoice in the art of naturally fermented probiotic drinks!

What is Kombucha:
If you’re new to kombucha, here’s the skinny: kombucha is a naturally fermented probiotic drink which can aid in digestion and gut health, increase energy naturally, and can create PH balance in your digestive tract.
Similar to yeast or yogurt cultures, kombucha is made from a living organism called a SCOBY, which stands for Symbiotic Culture of Bacteria and Yeast. It grows, multiplies and ferments which means it is very important to make sure the SCOBY stays clean and healthy.
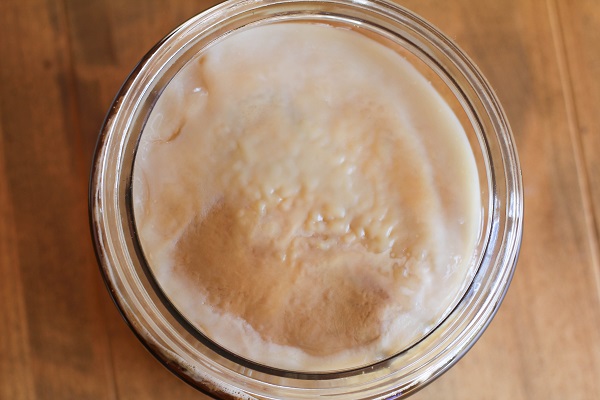
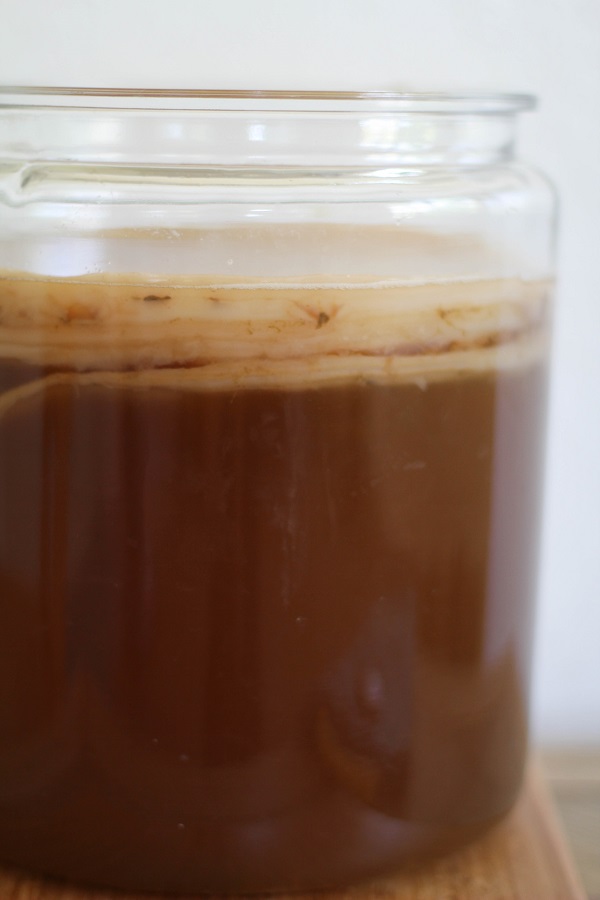
The photo above is what a healthy SCOBY looks like.
Health Benefits of Kombucha:
What’s the buzz about probiotics? They help maintain healthy microflora in your gut, which ensure efficient digestion and aids in nutrient absorption. They help you get the most out of the food you eat.
Probiotics prevent bad bacteria from attaching to the intestinal wall, which starves them of the nutrients they need to survive.
This strengthens your immune system and fights disease.
People who suffer from digestive ailments such as Crohn’s Disease, Celiac Disease, ulcers, Irritable Bowel Syndrome, Candida, etc. may find their symptoms improve with regular consumption of probiotic-rich food and drink.
Kombucha has also been known to boost your immune system (since it populates your system with good bacteria and rids your gut of bad bacteria), your energy level, and even your metabolism.
Probiotics and kombucha have been linked to mental health, as new research shows your brain health is linked to your gut health.
This fizzy beverage is also rich in folic acid, enzymes, amino acids, antioxidants, and Vitamins B1, B6, and B12. In addition, kombucha contains small amounts of zinc, copper, iron, and manganese.
A Cautionary Note
Making homemade kombucha can be risky if you are not careful. If you are new to making kombucha, please seek multiple how-to sources before making a batch.
It is very important to keep all instruments used in the process of making kombucha clean and to keep the SCOBY healthy.
Use common sense and make kombucha at your own risk. If you see a single spot of mold (from what I hear mold on kombucha looks similar to bread mold), abandon ship – throw out your whole SCOBY and discard all kombucha liquid.
Please read instructions very carefully before starting a batch of kombucha. Kombucha is not for everyone.
When you first read the how-to, it may seem long and complicated. The first go-round definitely requires attention to detail, but once you get the hang of it, it’s quick and easy and saves you a TON of money since buying kombucha from the store can cost between $2.50 and $4.00 per bottle.
Please read all instructions thoroughly at least twice before starting a batch of kombucha to ensure you get the best results.
What do I Need to Brew Kombucha?:
Below is a list of the ingredients you need to brew kombucha tea, followed by a list of tools you will need.
- 1 Kombucha SCOBY (we bought ours online)
- 1 Gallon spring water (we buy ours from the store in gallon jugs). Don’t use water from your faucet because it probably has chlorine and/or fluoride in it
- 10 black tea or green tea tea bags (choose pure black or green tea that doesn’t include any additional flavors, orange peels, oils, etc.).
- 1 cup organic cane sugar
Other things you will need:
- Large pot for boiling water
- Large (1-gallon or 2-gallon) glass jug/container
- Distilled White Vinegar
- Long-handle spoon for stirring
- Stick-on or floating thermometer
- Cheesecloth
- Large stretchy rubber band – I use the rubber bands that come around vegetables from the grocery store.
- Some type of heating device, such as a heating pad (only necessary if your house does not stay above 70 degrees F)
- Space blanket (again, only necessary if your house does not stay above 70 degrees)
- A large pitcher or an efficient method of transferring the kombucha from the jug to bottles or the dispenser you will be using to drink the kombucha out of.
- Small fine metal strainer (we use a metal coffee strainer)
- Sealable glass bottles, such as EZ Flip Cap Bottles
Alright, those are the items you need! Once you have everything, you can get started!
How to Brew Kombucha:
- Sanitize EVERYTHING you’re using to make kombucha. You can do this by running it through the dishwasher, hand-washing in very hot water, or by coating it in distilled white vinegar. We keep the jug we use for brewing sanitized by hand-washing it and pouring about ½ a cup of white wine vinegar in it and sloshing it around.
- Boil water. If you are making 1 gallon of kombucha, you do not need to boil the entire 1 gallon….just enough (1/2 gallon or so) to brew the tea.
- Once water has reached a boiling point, remove it from heat and add tea bags. Steep for 15 minutes. Remove tea bags, add the cane sugar and stir well.
- Allow the tea to cool to roughly 75 to 80 degrees F (or if you only boiled half a gallon of water, add the remaining half gallon of cool water so that the hot water cools faster).
- Transfer the cooled tea to a sanitized glass jar or jug. I like using a 1-gallon glass jug, but if you want a smaller batch to start out, you can use a large mason jar.
- Once the tea is in the 75 to 80 degree range, carefully place the SCOBY in the jug with the tea along with all of the liquid that came with your SCOBY. If you have less than 1 cup of starter liquid, you can buy an Original (unflavored) kombucha from the grocery store and add half of it to the tea. Having this starter liquid will help your kombucha brew, as it will colonize the tea with already live and active probiotics and yeast. For your first batch of kombucha, the SCOBY may fall to the bottom of the jug – this is normal. Towards the end of fermentation, it will likely float to the top. Note: if this is your first time making kombucha and you bought your SCOBY online, simply remove it from its package and slip it in the tea along with all of the liquid the SCOBY came with.
- If you have a flat sticky thermometer, stick it on the outside of the jug so that you can monitor the temperature.
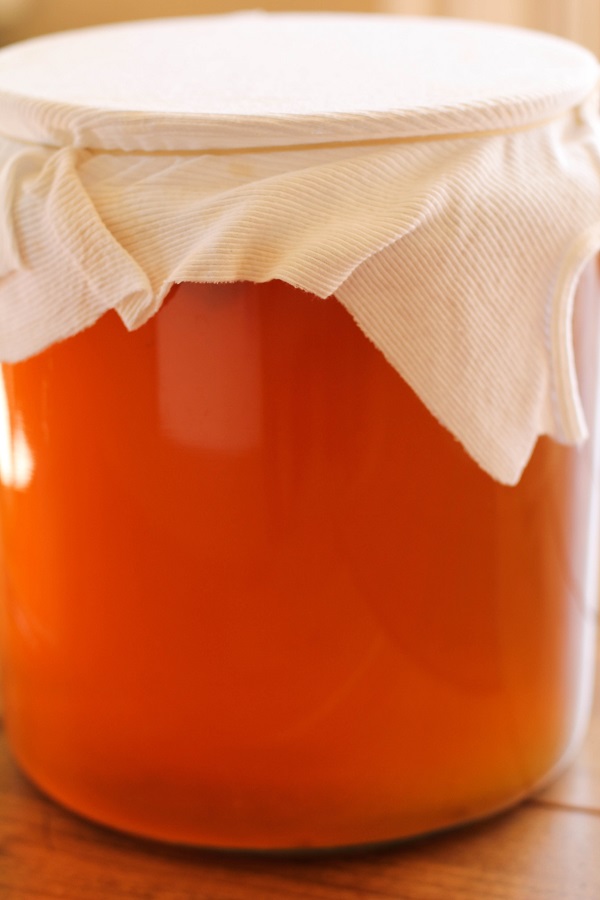
- Cover the jug with cheesecloth bound by a large rubber band so that the kombucha can continually breathe.
- Place jug in a dark place (closet or pantry) that stays relatively warm and is not disturbed by people and light.
- Allow kombucha to brew for 5 to 8 days (the longer it brews, the stronger it is). Be careful not to let it go too long, as it will become too strong for human consumption (and/or the probiotics and yeast will die) if it brews too long.
- Continually check the temperature of the kombucha. It needs to stay in the 70 to 80 degree range for best results. If it falls below 70, it’s not a huge deal, it will just take longer for the kombucha to brew. If the kombucha reaches above 85-degree temperature, you’re running the risk of growing mold on your SCOBY.
- After 5 to 8 days of brewing, your kombucha should be ready! It’s up to you if you want to flavor it or leave it plain. If you choose to leave your kombucha unflavored, you can pour the liquid into a pitcher, leaving the SCOBY with some liquid behind in the jug. You’ll use the pitcher to easily pour the kombucha into bottles for storing the kombucha. If your pitcher is not large enough to fit all of the kombucha in one go, simply do this step in batches. Pour the kombucha from the pitcher into sealable jars (I use flip-cap bottles), seal them up, and refrigerate. Kombucha can be stored sealed in a refrigerator for up to 1 month.
- Cover the jug with the SCOBY and starter liquid with cheesecloth bound by a rubber band and store it in a safe place until you’re ready to brew your next batch. NOTE: If you’d like to flavor your kombucha, you can move on to secondary fermentation (see instructions below).
Kombucha Brewing Tips:
Between batches of kombucha, leave the SCOBY in the jug with enough kombucha liquid to barely cover it, about 1-2 inches of liquid. This liquid will now be considered your “starter liquid,” which you’ll need for each batch of kombucha.
Always keep the jug covered with cheesecloth (or a breathable kitchen towel) bound by a rubber band to keep any bugs out of the SCOBY (if you leave it uncovered, bugs will gravitate toward it).
If you see any mold (it will look like bread mold…green/white and fuzzy circles), discard the SCOBY and the whole batch of kombucha.
You will notice your SCOBY is bigger after the first batch of kombucha – it will grow to the width of the container, and a second SCOBY will form. SCOBYs will always continue to grow with each batch of kombucha. Once a SCOBY gets to be a couple of inches thick, you need to peel off slices in order to keep the SCOBY healthy. You can give these slices to your friends along with some starter liquid so they can start their own batch, or you can discard them.
The SCOBY is fine to sit unused for a few days to a few weeks until you are ready to make another batch – just make sure you keep the jug covered with cheesecloth, and check the SCOBY before starting another batch to be sure it’s mold-free and is still floating in starter liquid. I have had my SCOBY sitting unused for up to three weeks. Just be sure you check on it from time to time.
One of the best parts about brewing kombucha is flavoring it. Once you have finished your primary fermentation, you can either bottle your kombucha and be done, or you can perform a secondary fermentation to flavor it. Here is how to do a secondary fermentation.
Secondary Fermentation:
While secondary fermentation is not necessary in brewing kombucha, this extra step is what enables you to flavor your kombucha as desired, and makes the drink “effervescent” or fizzy.
When more sugar is added to the brewed kombucha, either in the form of 100% juice, fruit, or brewed tea with cane sugar, the kombucha can be brewed again for a second time. The probitoics continue to grow, as they feed off of the added sugar. It is during secondary fermentation that kombucha becomes fizzy!
IMPORTANT NOTE: Secondary fermentation happens without the use of the SCOBY. You do not use the jug with the SCOBY for secondary fermentation. In order to keep your SCOBY healthy, you never want it to come into contact with anything other than brewed tea with sugar. Read all instructions for secondary fermentation very carefully before proceeding.
To put your kombucha through secondary fermentation, follow all of the instructions above, but instead of bottling the kombucha and being finished at Step 13, add your flavorings to the pitcher with the brewed kombucha (NOT the jug with the SCOBY!)
To recap: after your first fermentation is complete, pour the brewed kombucha into a pitcher, leaving the SCOBY with some starter liquid in the jug. Cover the jug with the SCOBY with the cheesecloth bound by a rubber band, and store it in a warm, safe place. You now have your pitcher of kombucha, which is what you will use to move forward with secondary fermentation.
Kombucha Flavor Ideas:
- FRUIT JUICE: Use 100% fruit juice. Combine 1 cup of 100% fruit juice with every 1 gallon of kombucha. Simply pour the fruit juice into the pitcher with the brewed kombucha, give it a stir, then transfer to the bottles.
- FRESH FRUIT AND/OR HERBS: Combine 1 to 2 cups of fresh fruit (berries are especially divine) plus 1/2 cup of cane sugar + 1 to 2 cups spring or well water. Heat the fruit and sugar together on the stove top in order to dissolve the sugar and release the fruit juices. Allow this mixture to cool to room temp before adding it to the pitcher with the pitcher with the brewed kombucha. You can also add fresh herbs here! Once combined, give everything a good stir and pour it into the bottles with the fruit pulp. The fruit pulp will make the kombucha very fizzy!
- BREWED TEA: If you love the original flavor of kombucha but still want to put it through a secondary fermentation, simply brew another batch of green or black tea (tea without any peels or oils works best). Brew 2 to 4 teabags in 2 to 4 cups of water with 1/2 cup of sugar. Allow it to cool to room temperature before combining it with the brewed kombucha.
NOTE: If your pitcher is not large enough to fit both the kombucha and the flavor add-ins, do this step in batches.
Once you have added your ingredients for secondary fermentation to the pitcher with the kombucha, pour the kombucha into glass sealable bottles, seal them tightly, and allow the bottles to sit in a warm, dark place for 3 days, then transfer the bottles (still sealed) to a refrigerator.
When ready to drink, open the bottles carefully (aim them away from your face), as the additional fermentation creates gasses that build pressure in the bottles. Note: Your kombucha will continue to ferment while in the refrigerator, although refrigerating it slows the fermentation process significantly.
If you put the kombucha through a second fermentation, more sediment (and likely a hunk of SCOBY) will grow inside of the bottles. I recommend straining the kombucha before drinking it, to get out any fruit pulp and/or newly grown SCOBY.
A note about sanitizing your jug:
The jug you use for brewing kombucha does not need to be sanitized between batches, but if you’d like to sanitize the jug at some point (just for peace of mind), you can transfer the SCOBY and liquid to a large bowl, then sanitize the jar using white vinegar. Then, transfer everything back over to the sanitized jug.
Here’s a simple photo tutorial on How to Brew Kombucha:
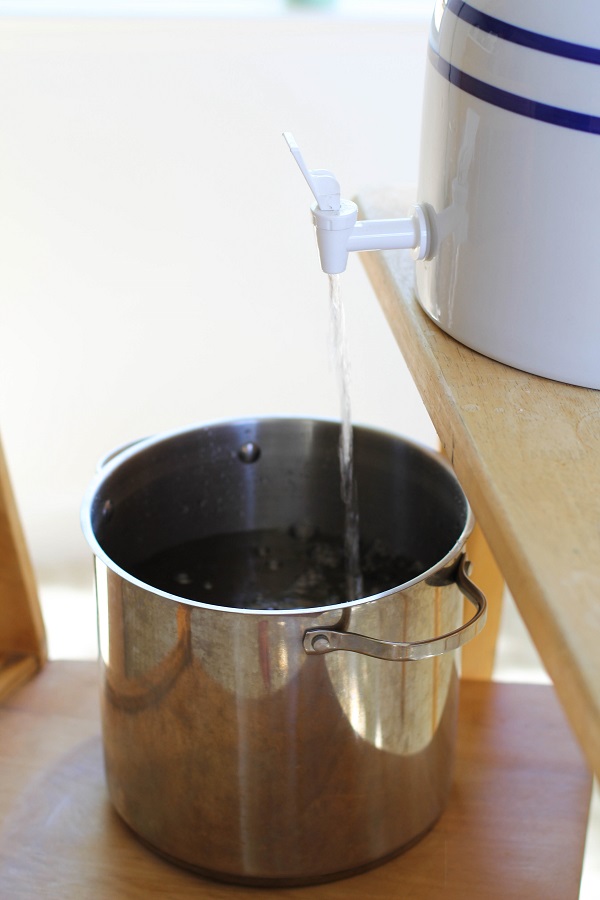
Fill a large pot with spring or well water and bring it to a boil.
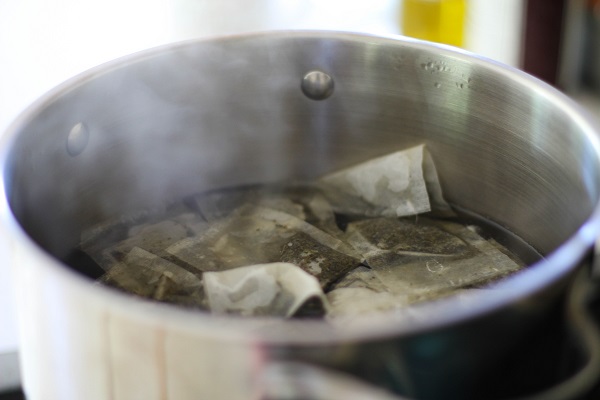
Add the tea bags and allow them to steep.
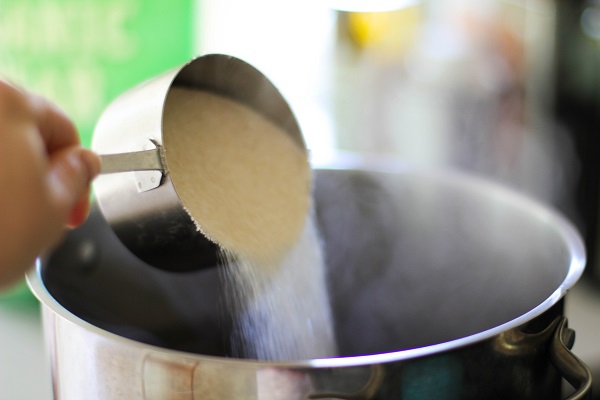
Add the sugar and stir to dissolve. Allow the tea to cool to 75 to 80 degrees F
Pour the tea in a large glass jar and add the SCOBY.
Cover with cheesecloth bound by a rubber band and place in a warm, dark closet for 5 to 8 days. Note: the first batch may take up to 10 days, but every sequential batch should take less time.
Now you’re ready to bottle your kombucha, or to put it through secondary fermentation.
- Apple Cider Kombucha
- Pomegranate Kombucha
- Orange Creamsicle Kombucha
- Strawberry Basil Kombucha
- Grapefruit Rosemary Kombucha
- Apple Ginger Kombucha
- Lavender Kombucha
How to store your SCOBY after a brewing a batch of Kombucha:
After you have brewed a batch of kombucha, you can start the process again by following the same steps! This ensures you have a continuous supply of kombucha and ensures your SCOBY stays active and healthy.
Since we typically brew 1 to 2 gallons of kombucha at a time, we don’t need to continue brewing batch after batch. When I take a kombucha brewing hiatus, I simply leave the SCOBY in the same jar I use for brewing along with plenty of kombucha liquid (I leave about 3 inches of liquid per 1 inch of SCOBY).
Keep the jar covered with cheesecloth bound by a rubber band. Place a bath towel over the jar, and store it in a warm dark place (just like I would do if I were brewing a batch).
If you take a break between batches of kombucha, it may take slightly longer for your next batch to brew because your SCOBY may take a little time to come out of hibernation mode.
I have taken breaks up to 2 months between batches, although I wouldn’t recommend taking much longer than a month off in order to ensure your SCOBY stays alive and happy.
If you’d like more flavoring ideas for your kombucha, and/or if you’d like to learn how to brew other types of probiotic drinks, check out my cookbook, Delicious Probiotic Drinks!
Feel free to leave a comment below if you have any questions! Good luck on your kombucha brewing and remember: fermenting drinks at home is fun, easy, affordable, and healthy!!
For more tips, tricks, information and recipes on kombucha and other probiotic drinks, check out my book, Delicious Probiotic Drinks!!








good site thanks
thanks for the information
useful information
thanks for the useful posts and information
I wіll not haѵe anyone in mү life ԝho is not supportive.
” Do keep receipts and bills of all expenses incurred in the accident to be presented to your insurer. Personal bankruptcy should be a last resort in debt management and debt consolidation.