
This post may contain affiliate links. Read our privacy policy.
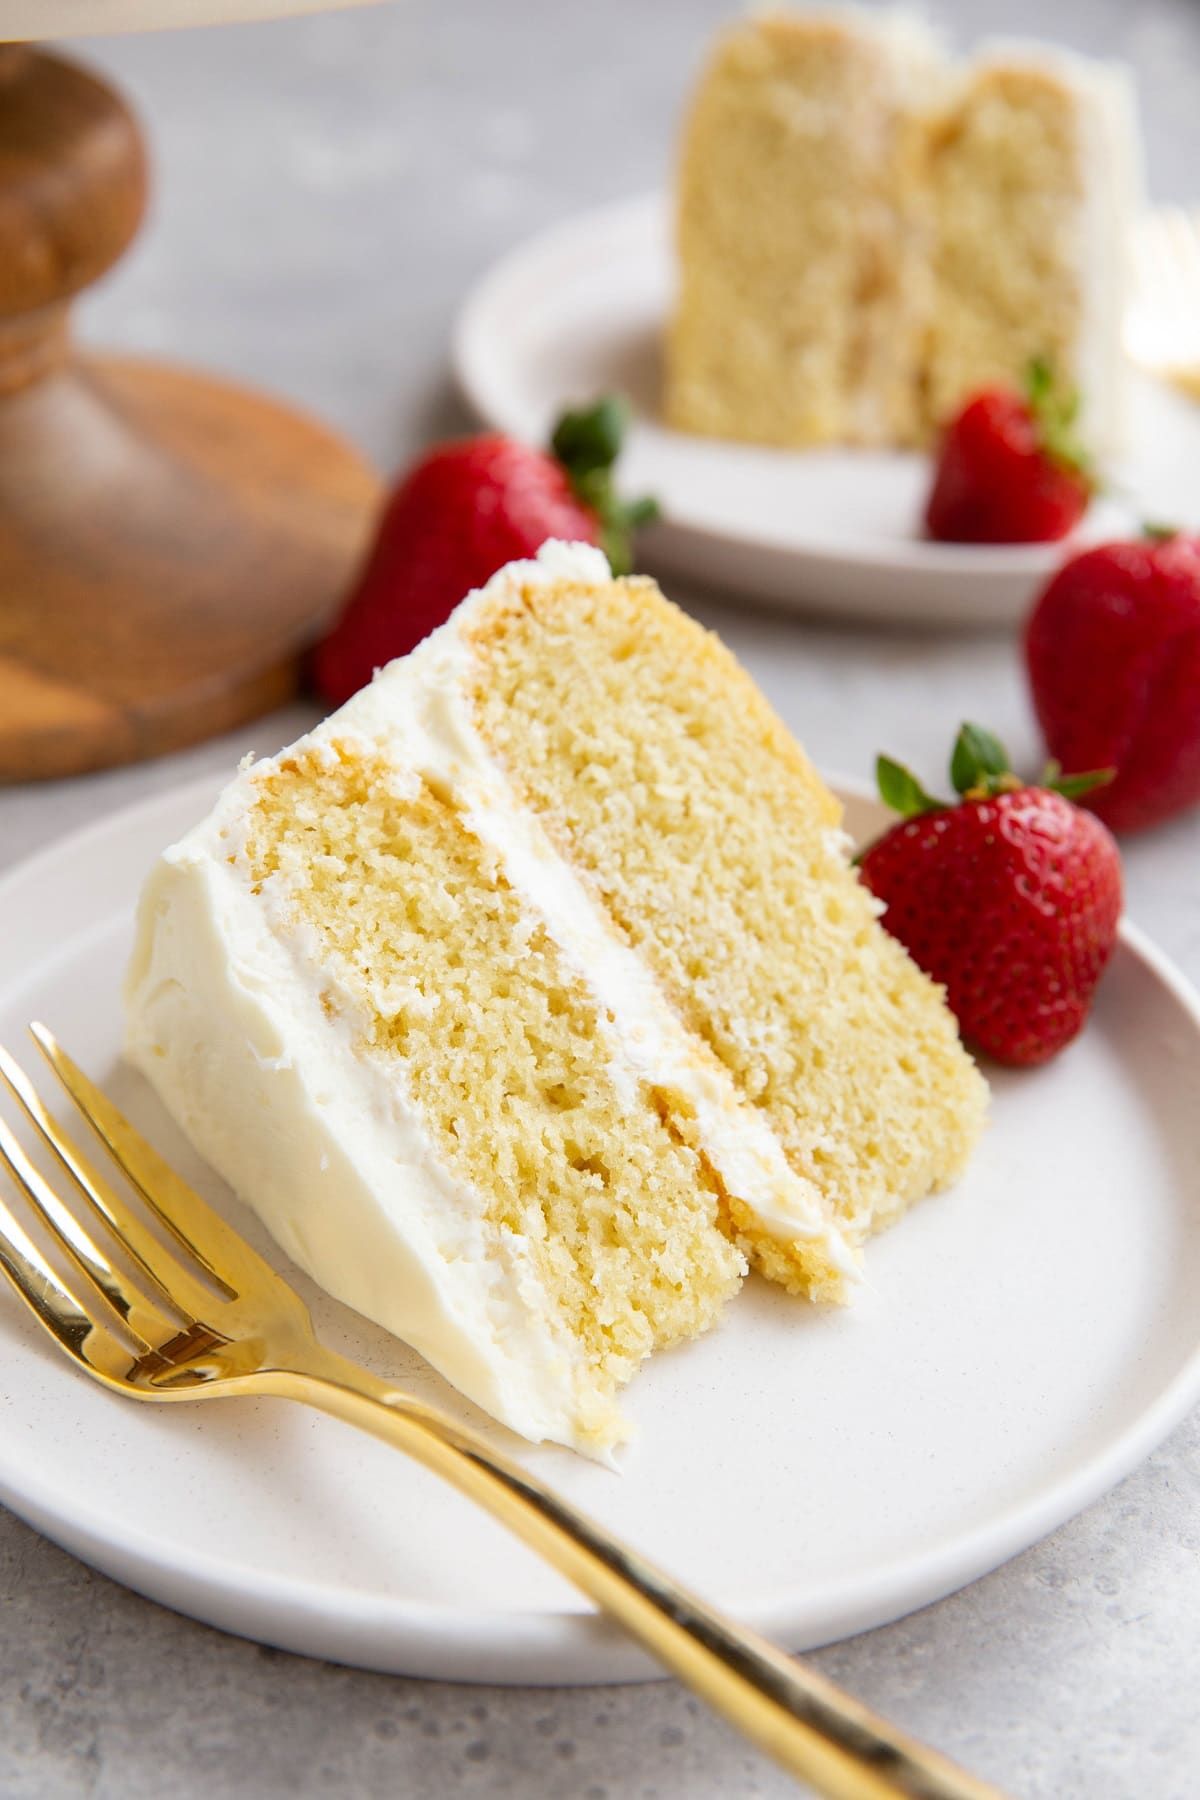
This moist and rich Gluten-Free Dairy-Free Vanilla Cake recipe is perfect for celebrating birthdays and special occasions! Whip it up with your favorite frosting and/or filling for an unforgettable celebration.
So you’re looking for a gluten-free vanilla cake recipe to bake for a special someone and you need the absolute best vanilla cake?
You’re in the right spot because not only is this the best gluten-free vanilla cake I’ve had, but I’m confident in saying it rivals regular cake.
I know, I know, a bold statement.
You’ll just have to try it and let me know whether or not you agree 😉
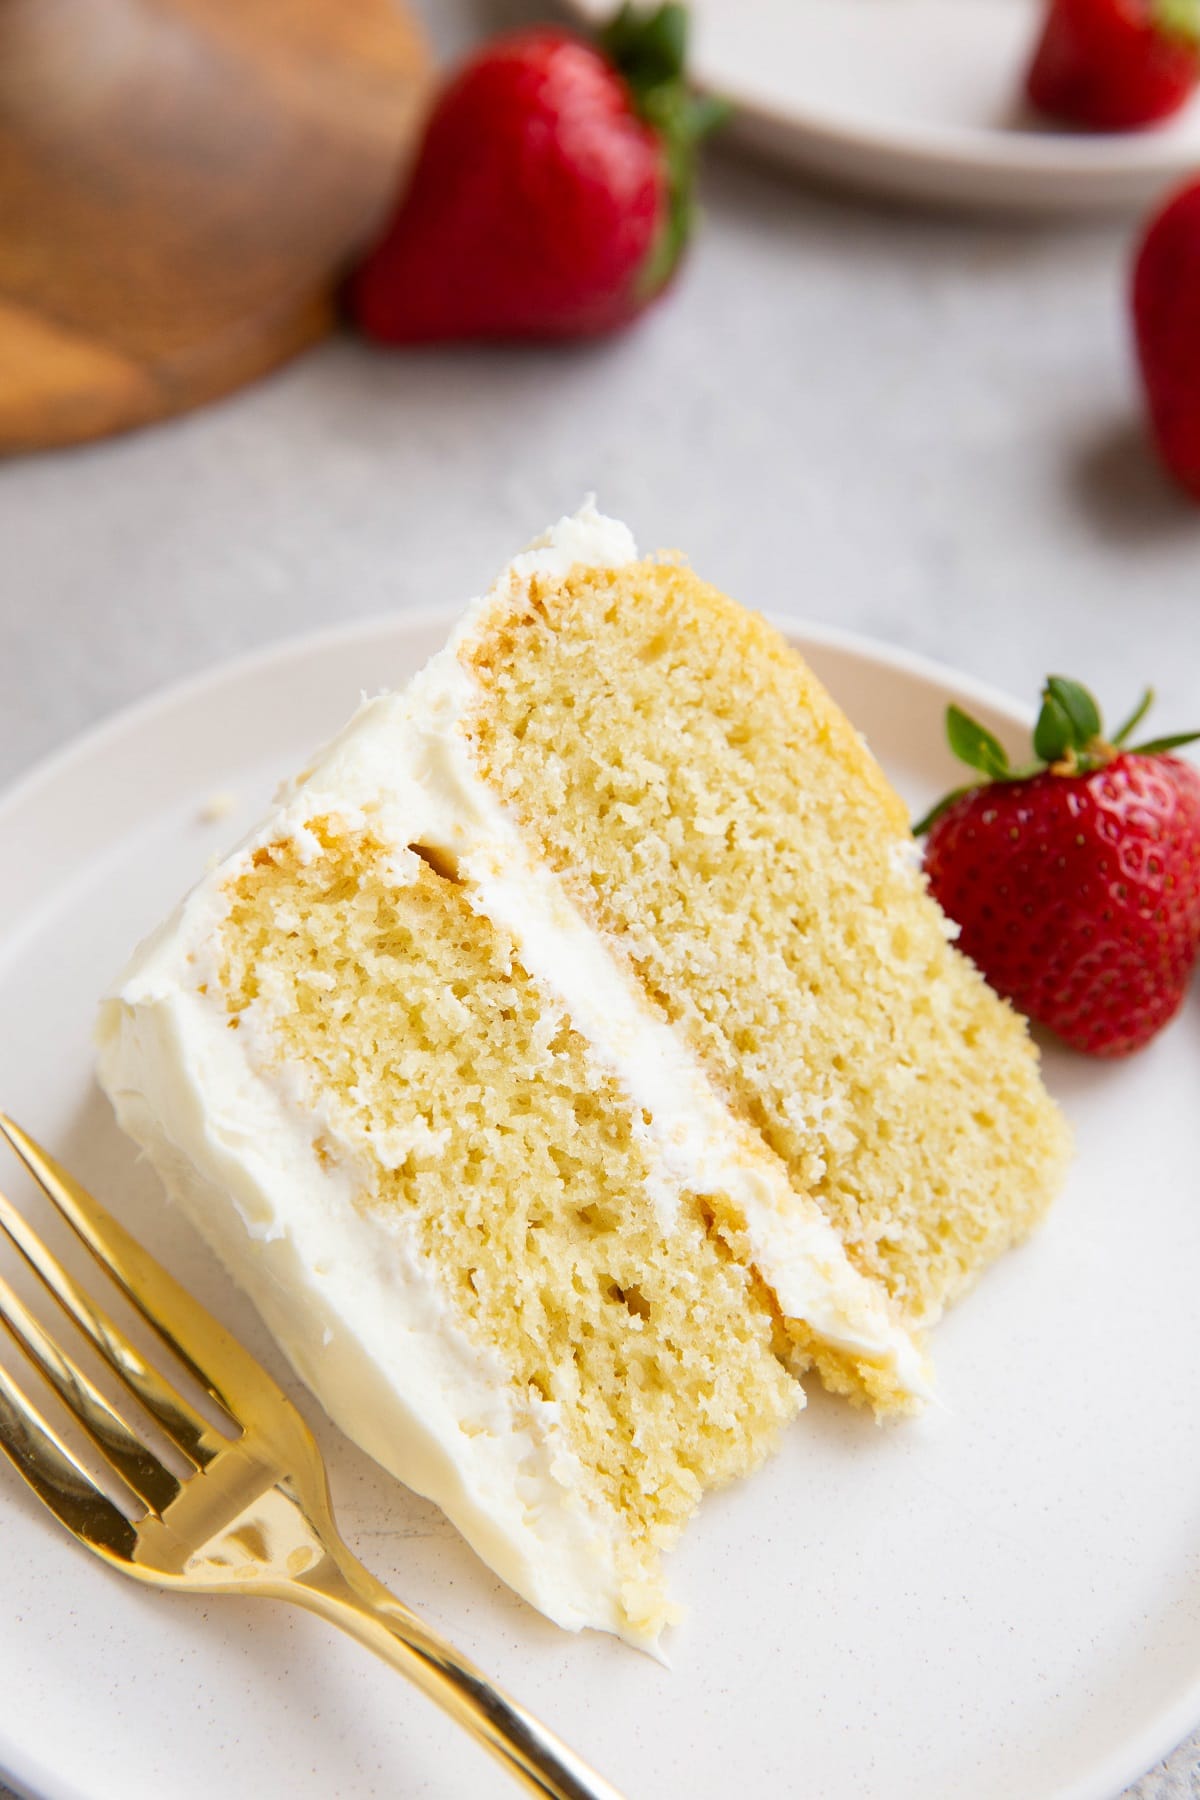
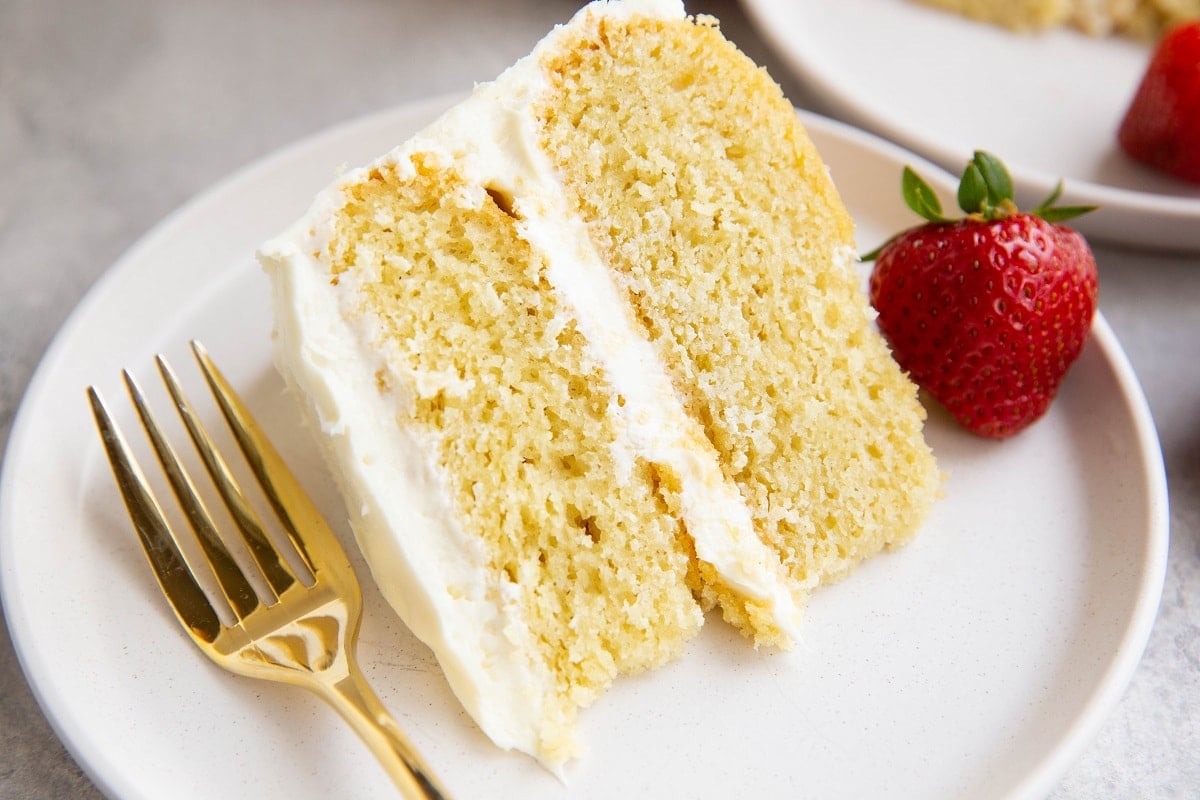
When I was a kid, I always asked for vanilla cake with buttercream frosting and fresh strawberries in the middle for my birthday.
While I’m much more into something chocolate and gooey as an adult, vanilla cake holds that warm nostalgia.
The best part about this recipe is it can be customized to fit the taste buds of the person we’re celebrating.
For instance, you can use chocolate frosting, cream cheese frosting, and add fresh fruit to the center layer. Plus, the cake’s your canvass when it comes to decoration!
You don’t need to own a stand mixer or even an electric hand mixer to prepare this recipe! All you need is a couple mixing bowls.
Even those who don’t follow a gluten-free diet or a dairy-free diet will find this gluten-free cake recipe simply sensational. The texture of the cake is so moist and divine and the flavor of the cake far supersedes a grocery store cake.
Let’s discuss the simple ingredients for this delicious vanilla cake recipe.
Ingredients for Gluten-Free Vanilla Cake:
Gluten-Free All-Purpose Flour: Taking the place of regular all-purpose flour, we use a gluten-free flour blend. Make sure the blend you use is designed to be a 1:1 replacement for regular flour.
I use King Arthur Measure For Measure Gluten-Free Flour and have also found Bob’s Red Mill 1-to-1 Baking Flour to be magnificent too.
The benefit to using a store-bought blend rather than making your own is it already has the right combination of starches, different flours and leavening agents, like potato starch, white rice flour, brown rice flour, and xanthan gum.
This ensures gluten free recipes turn out almost identical to recipes made with regular wheat flour.
After many years of gluten free baking without blends, I was ecstatic when they came on the market because they eradicate the troubleshooting. They make great fluffy cakes!
Granulated Sugar: In order to sweeten the cake, we use regular granulated sweetener. I stick with organic cane sugar.
Baking Powder and Baking Soda: The leavening agents here, we use both baking soda and baking powder. Be sure to check that they aren’t expired before starting any baking project.
Sea Salt: Salt enhances the flavors of every ingredient and brings out that vanilla flavor. One teaspoon of salt may sound like a lot, but trust me on this one. If you use iodized salt (regular table salt) instead of sea salt, decrease the measurement to ½ teaspoon, as iodized salt is saltier.
Avocado Oil: The moist crumb of this delicious cake can be attributed to its fat content. The majority of the fat in this dairy-free vanilla cake comes from avocado oil. I use avocado oil because it contains healthy fats (unlike canola oil or vegetable oil) and also has neutral flavor.
If you prefer using vegetable oils, feel free to make the swap. I don’t recommend using olive oil because you’ll be able to taste it.
Full-Fat Canned Coconut Milk: Canned coconut milk brings additional liquid, moisture, and fat to the recipe as well as a very subtle naturally sweet flavor. Trust me, the cake doesn’t taste like coconut.
I don’t recommend replacing the coconut milk with any other dairy-free milk like almond milk, cashew milk or the coconut milk in a carton. While this route reduces the fat content of the cake, it also reduces the moisture.
Large Eggs: A few large eggs make the cake nice and fluffy and give it the best texture. No need to separate the egg yolks from the egg whites here!
I haven’t tested the recipe using an egg replacer like flax eggs, but let me know in the comments below if you try it.
I have had success with vegan cake recipes replacing the eggs with equal parts coconut milk. If you’d like to try this route, omit the eggs and use 1 ¾ cups of coconut milk (a full can).
Pure Vanilla Extract: The true star of the show here, a whopping tablespoon of pure vanilla extract is the key ingredient that provides the abundance of vanilla flavor in the cake. Be sure to use a good-quality vanilla extract for the best results.
Dairy-Free Buttercream Frosting:
If you’re looking for a creamy vanilla buttercream frosting recipe to frost the cake, I have provided one in the recipe card below.
A combination of vegan butter (or dairy-free butter spread), full-fat coconut milk, confectioner’s sweetener, and vanilla extract is all you need.
You can also make two batches of my Vegan Cream Cheese Frosting or use any store-bought or homemade frosting of choice.
Recipe Adaptations:
- If you prefer less refined sugars, I recommend replacing the cane sugar with maple sugar, which will still result in the classic pale yellow cake color. If you use coconut sugar, the cake will turn out looking slightly brown. It will still taste great but won’t be as visually appealing.
- If you aren’t dairy-free, you can replace the avocado oil with 2 sticks of melted butter, and the full-fat canned coconut milk with 1 cup of buttermilk or whole milk
- For the vanilla buttercream, use softened unsalted butter and heavy cream to replace the vegan butter and coconut milk
- Finely chop strawberries or mash raspberries and add them to the filling between the cake layers
- If you don’t want to make a layer cake, bake the cake batter in a large 13″ x 9″ pan for a sheet cake.

Now that we’re familiar with the basics, let’s bake the best gluten-free vanilla cake!
How to Make Gluten-Free Vanilla Cake:
Preheat the oven to 350 degrees Fahrenheit and line two 8-inch spring form cake pans with rounds of parchment paper. You can also grease the sides of the cake pans.
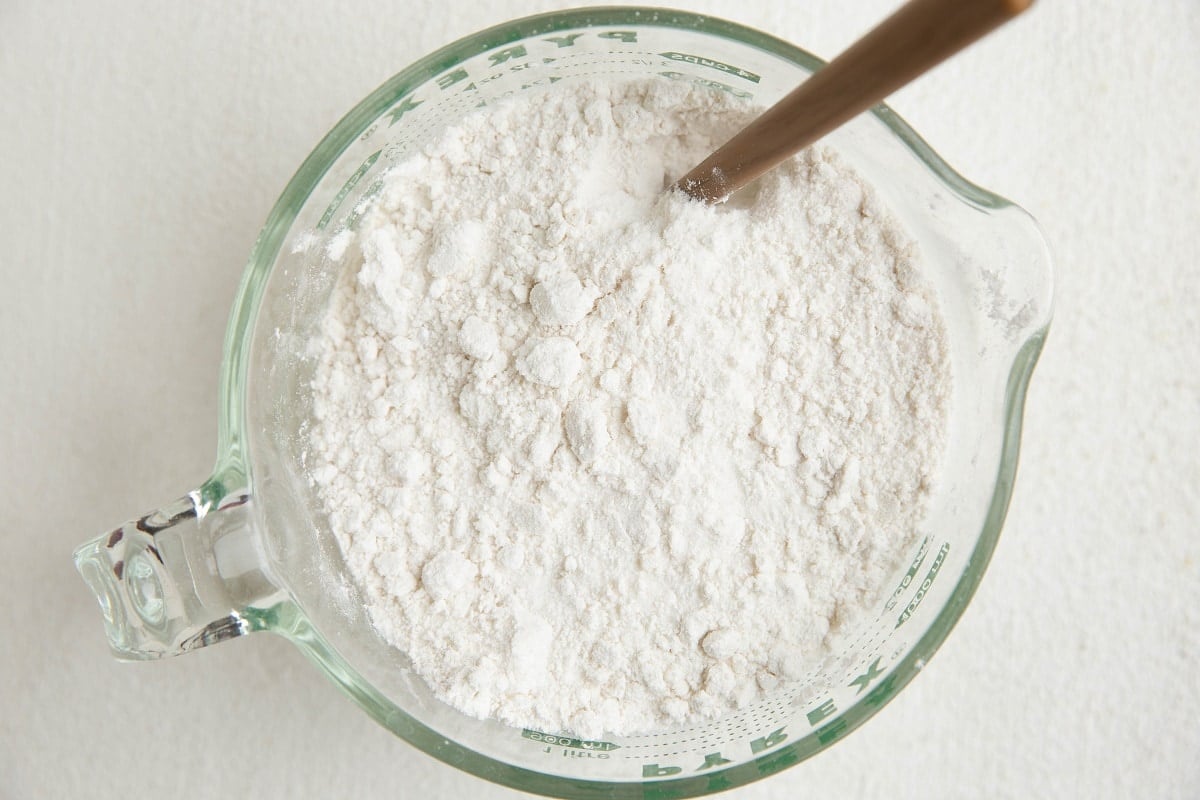
In a large mixing bowl, combine the dry ingredients (gluten-free flour, granulated sugar, salt, baking powder, and baking soda) and stir together until everything is well-combined.
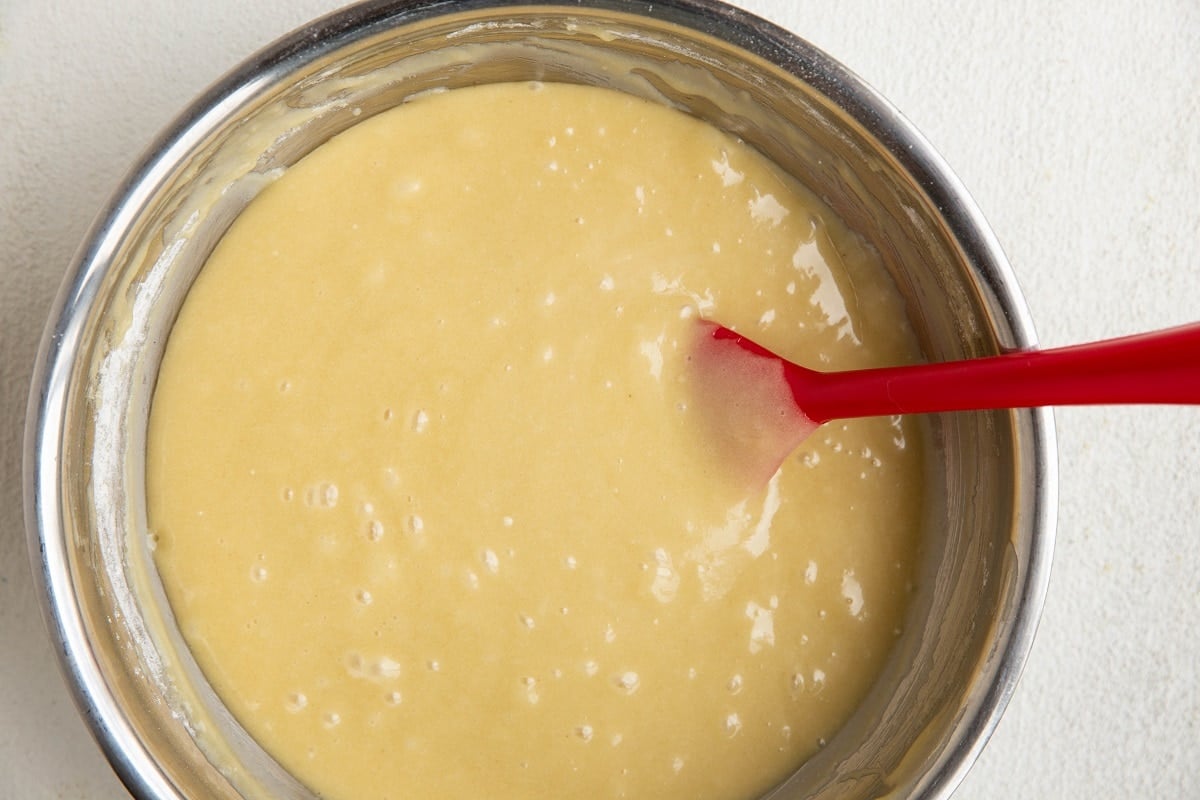
In a separate bowl, whisk together the avocado oil, eggs, full-fat coconut milk and vanilla extract (the wet ingredients).
Note: if your house is fairly chilly and the coconut milk has separated, transfer it to a jar and microwave it for 30-60 seconds or until it is easy to stir together.

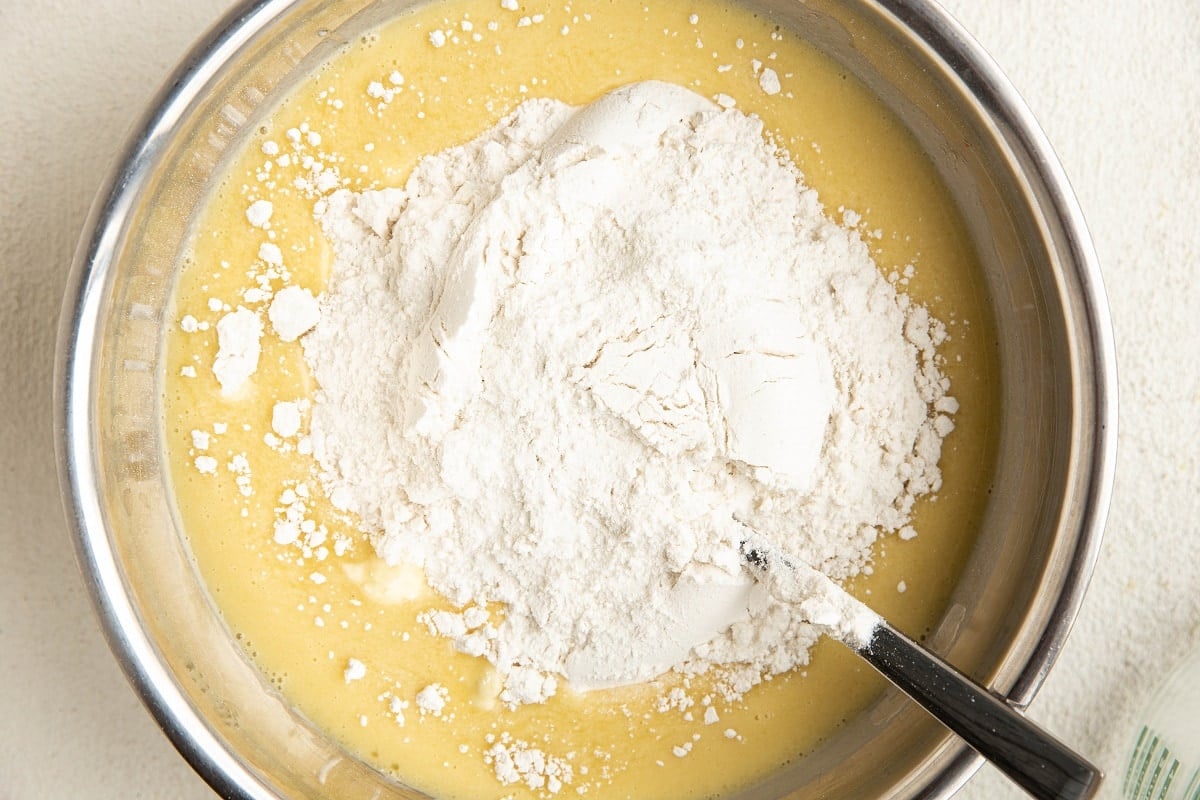
Pour the dry ingredients into the bowl with the wet ingredients and mix until a smooth cake batter forms.
Divide the vanilla cake batter between the two prepared cake pans.
Bake on the center rack of the preheated oven for 23 to 28 minutes, or until the cake has set up and is slightly golden brown around the edges.

The exact bake time depends on the flour you use, the elevation you life at, and the temperature of the cake batter going into the oven. If you’re at high altitude like me, you’ll need to bake closer to 28-30 minutes.
Cakes are considered fully cooked when they have reached an internal temperature of 190 to 200 degrees Fahrenheit. You can insert an instant read thermometer into the center of the cakes to verify the temperatures.
Once the cakes are out of the oven, allow them to cool completely to room temperature. If you have a wire rack or a cooling rack, cool the cakes on top of it.
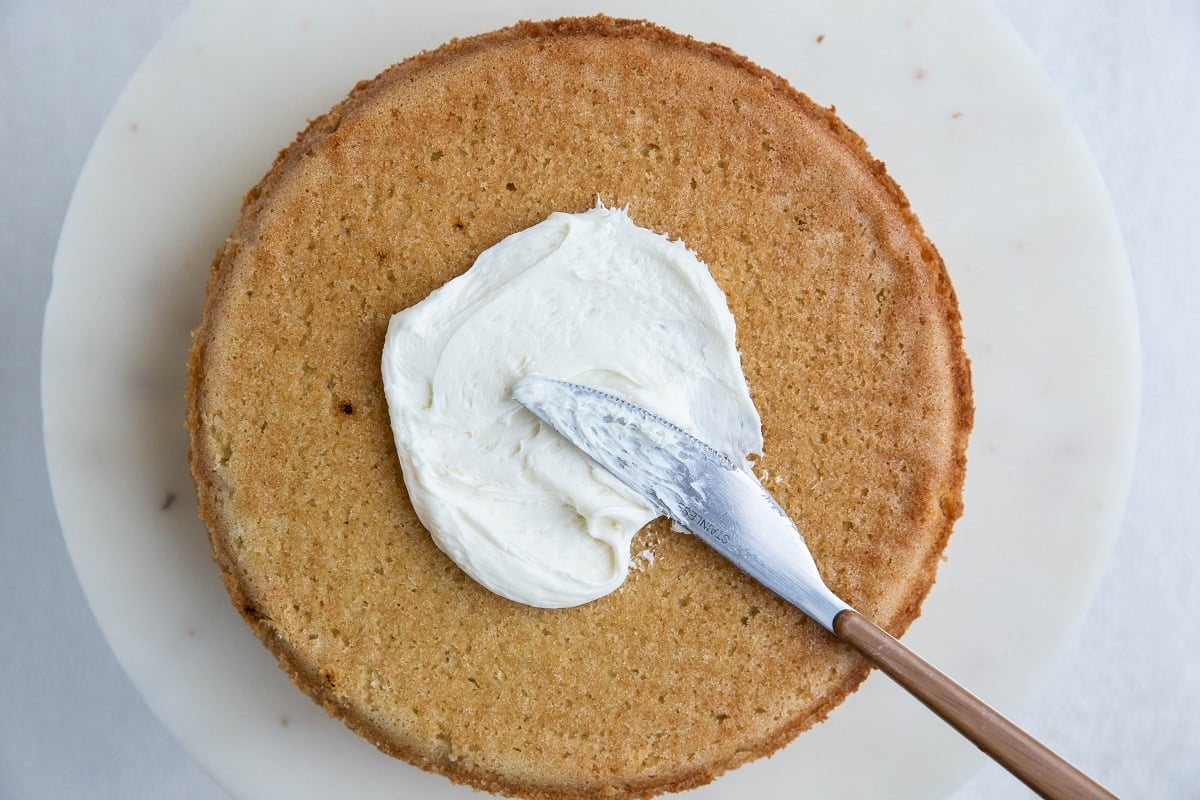
Release the cakes from their molds and transfer one of them, rounded side down, to a serving dish or a cake stand.
Apply a generous layer of frosting on top of the first layer. Aim for about ½ inch thick. If you’d like, you can layer chopped strawberries or mashed raspberries here for a fruit layer.
Place the second cake layer rounded side down on top of the frosting (or use a sharp knife to cut the rounded part of the cake off so that it sits flat).
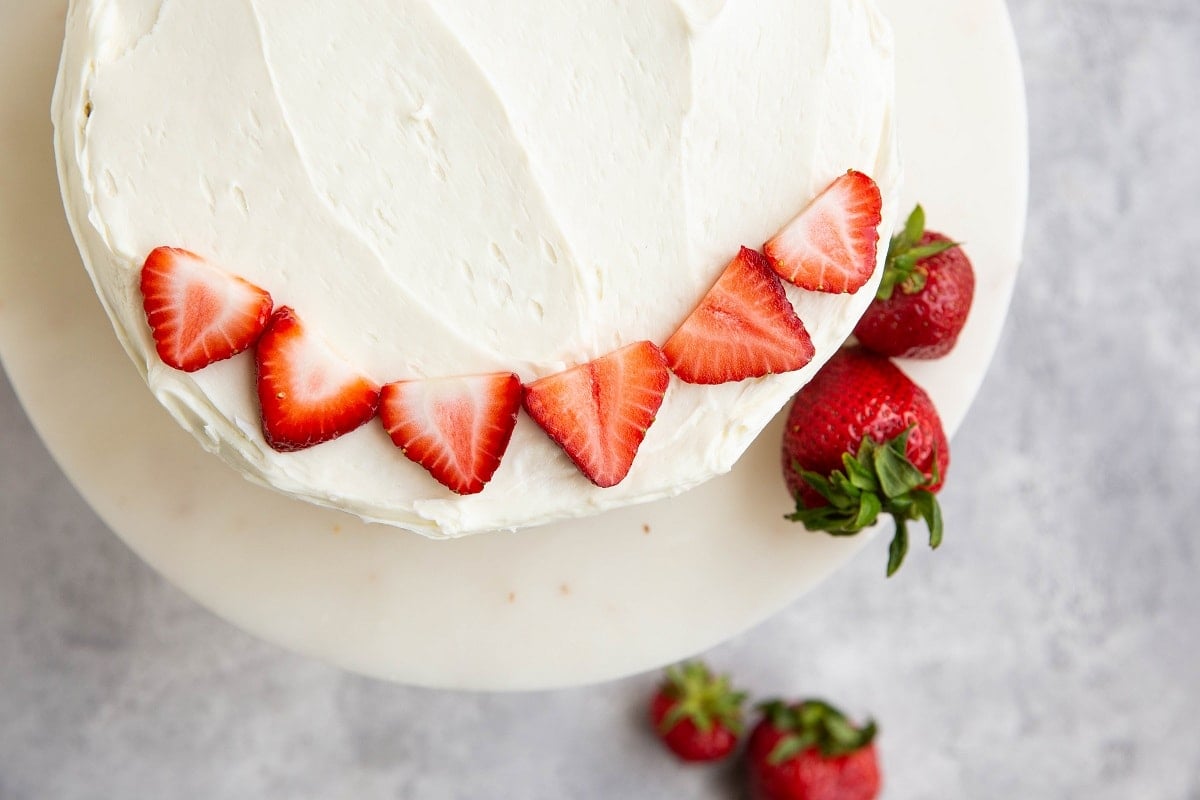
Frost the rest of the cake to your desired level of frosting. You can do as I do and engulf the whole thing in frosting, or take a naked cake approach and apply a light layer of frosting.
Decorate the cake to your heart’s desire! This is not my forte, so I keep it plain and simple.
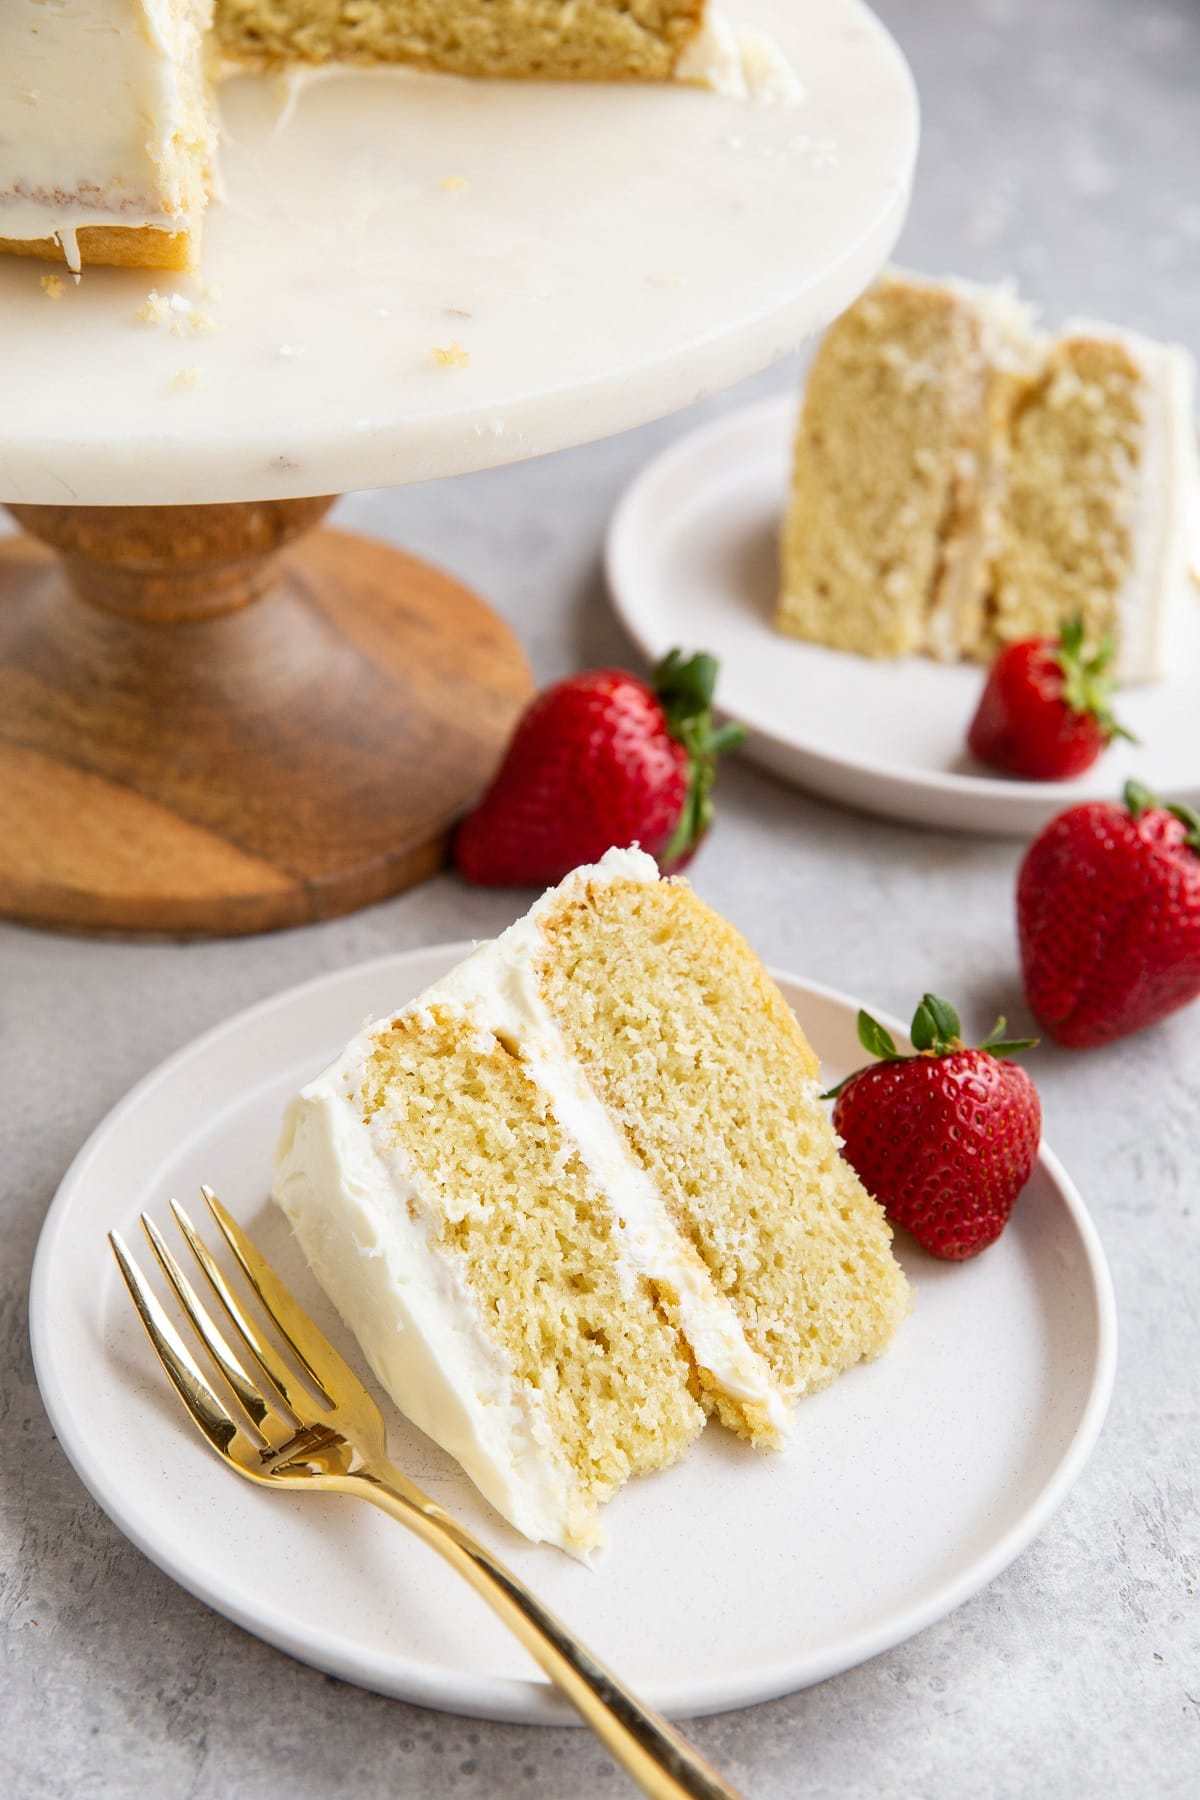
Serve and enjoy!
How to Make Dairy-Free Vanilla Buttercream:
Beat the butter until creamy using a stand mixer fitted with a paddle attachment or a handheld mixer.
Add half of the powdered sugar, the coconut milk, vanilla extract and sea salt to the mixer. Beat on low speed until the sweetener has mixed in, then on high speed for 2 minutes. Check the frosting for consistency and flavor and add more powdered sugar to your liking.
Cake Tips:
Cake tastes even better and has the best texture the next day after it has been assembled. For this reason, I recommend preparing the full cake the day before you intend to serve it, or at least many hours.
You can also bake the cakes a day before you intend to frost them to ensure they have cooled completely and don’t shed crumbs when you frost the cake.
If you own a stand mixer or an electric mixer, feel free to put it to use here. Simply beat the wet ingredients followed by the dry ingredients on low speed until combined.
How to Store Cake:
Before the cake has been cut into, you can store it uncovered on the counter for 36 hours. Once cut, cover the cake in plastic wrap and keep it on the counter for up to 2 days.
Or, transfer the cake to an airtight container and refrigerate for up to 7 days.
You can also freeze cake by transferring it to a large freezer bag and freezing for up to 3 months.
And that’s it! A delicious, moist perfect vanilla cake recipe your friends and family will love.
If you’re looking for more gluten-free cake recipes, also try out these reader favorites!
More Gluten-Free Cakes:
- The Best Gluten-Free Chocolate Cake
- Gluten-Free Carrot Cake
- Paleo Blueberry Cake
- Almond Flour Lemon Cake
- Grain-Free Banana Cake with Cashew Cream Cheese Frosting
- Almond Flour Carrot Cake
Enjoy this slice of vanilla heaven at your next family birthday party or special occasion!
Gluten-Free Vanilla Cake

Ingredients
Gluten-Free Vanilla Cake:
- 2 ⅓ cups (320g ) gluten-free all-purpose flour
- 1 ½ cups (330g ) granulated sugar
- 1 tsp sea salt
- 2 tsp baking powder
- 1/4 tsp baking soda
- 3/4 cup (175ml) avocado oil
- 1 cup (225ml) full-fat canned coconut milk
- 3 large eggs
- 1 Tbsp pure vanilla extract
Dairy-Free Vanilla Buttercream Frosting:
- 2 sticks (1 cup, 230g) vegan butter*
- 4 to 6 cups (480-600g) powdered sugar**
- 6 to 8 Tbsp (80-100ml) full-fat canned coconut milk, as needed***
- 1 tsp pure vanilla extract
- Pinch sea salt
Instructions
- Preheat the oven to 350 degrees Fahrenheit and line two 8-inch spring form cake pans with rounds of parchment paper. You can also grease the sides of the cake pans.
- In a large mixing bowl, combine the dry ingredients (gluten-free flour, granulated sugar, salt, baking powder, and baking soda) and stir together until everything is well-combined.
- In a separate bowl, whisk together the avocado oil, eggs, full-fat coconut milk and vanilla extract (the wet ingredients). Note: if your house is fairly chilly and the coconut milk has separated, transfer it to a jar and microwave it for 30-60 seconds or until it is easy to stir together.
- Pour the dry ingredients into the bowl with the wet ingredients and mix until a smooth cake batter forms.
- Divide the vanilla cake batter between the two prepared cake pans. Bake on the center rack of the preheated oven for 23 to 28 minutes, or until the cake has set up and is slightly golden brown around the edges. The exact bake time depends on the flour you use, the elevation you life at, and the temperature of the cake batter going into the oven. If you're at high altitude like me, you'll need to bake closer to 28-30 minutes.
- Once the cakes are out of the oven, allow them to cool completely to room temperature. If you have a wire rack or a cooling rack, cool the cakes on top of it.
- Release the cakes from their molds and transfer one of them, rounded side down, to a serving dish or a cake stand. Apply a generous layer of frosting on top of the first layer. Aim for about ½ inch thick. If you’d like, you can layer chopped strawberries or mashed raspberries here for a fruit layer.
- Place the second cake layer rounded side down on top of the frosting (or use a sharp knife to cut the rounded part of the cake off so that it sits flat). Frost the rest of the cake to your desired level of frosting. You can do as I do and engulf the whole thing in frosting, or take a naked cake approach and apply a light layer of frosting.
- Decorate the cake to your heart’s desire! This is not my forte, so I keep it plain and simple.
- Serve and enjoy!
Dairy-Free Vanilla Buttercream:
- Beat the butter until creamy using a stand mixer fitted with a paddle attachment or a handheld mixer.
- Add half of the powdered sugar, the coconut milk, vanilla extract and sea salt to the mixer. Beat on low speed until the sweetener has mixed in, then on high speed for 2 minutes. Check the frosting for consistency and flavor and add more powdered sugar to your liking.
Notes
Nutrition
Nutrition information is automatically calculated, so should only be used as an approximation.
Like this recipe? Rate and comment below!
This post contains affiliate links, which means I make a small commission off items you purchase at no additional cost to you.


I love this recipe— thank you so much for sharing. It’s been pinned for a couple years now as my go-to vanilla base for each bday cake I make for our 3 boys, as my husband was diagnosed with celiac a few years back and one of my boys can’t have dairy. Friends (adults and kids-alike) rave about it at the bday parties. Making it again today as our oldest turns 6!
This is amazing to hear, Em! I’m happy to hear the recipe has been working so great for your family, and I really appreciate you swinging back around to share your experience! 🙂
Good
Thank you, Ebby!
I am so glad I came across your recipe, it sounds great. Thank you for the detail instructions. I am assuming this batter can be made into cupcakes ? Let me know
Thank you
Hi Holly! I have had others report back that they used the recipe to make cupcakes 🙂 350 for 18-20 minutes should get you there. I like doing the thermometer trick to all my baked goods to make sure they’re done on the inside. Simply stick a thermometer into one of the cupcakes as soon as they come out of the oven, and if they are 190 degrees in the center or higher, they’re ready 🙂
So glad I came across this recipe! Going to make a baseball field cake for my grandson and need to make gluten-free dairy-free. I am going to a 12-in round cake in one layer. I don’t have a spring form Pan, so I’m thinking of putting parchment paper on the bottom greasing it really well and putting flower nails in the bottom. Should that work? And I’m thinking cook it at 325°?
Also, I’m wondering if avocado oil (can’t find any plant-based butters here) would work for the frosting? Hope to hear from you, thanks!
Hi Diane! I’m happy to hear you’re excited about the cake, and I’m thrilled you’re turning it into a baseball field for a birthday – how fun!! I’ll address your questions in order:
1.) I’m not sure what flower nails are – can you please explain? In general, I do think your plan of using a 12-inch round pan (non-spring form) lined with parchment will work. I would also spray the sides with cooking oil to be sure it releases easily.
2.) I haven’t tested the recipe using a 12-inch pan, so I can’t be sure about the time or temp, but 325 sounds reasonable. I would definitely use the thermometer trick, where you test for doneness by sticking a thermometer into the center of the cake. It’s ready to be taken out if the center is 190 degrees F or higher (ideally, it should come out anywhere between 190 and 205 degrees).
3.) I don’t believe avocado oil will work for a frosting. I’m actually not sure how else you could go about the frosting other than buying a store-bought frosting. Many store-bought frostings are dairy-free, but they have a high fructose corn syrup and some other not great additives. I think it might be your best bet, though, as Betty Crocker, Pillsbury, and many other brands do have dairy-free options. I hope this helps!
Hi Julia, thanks so much for getting back to me! Today is bake the cake day! I’ll then crumb coat it and freeze it until the day before the party when I will frost and decorate (next week).
It was so helpful to hear from you. I just learned about flower nails. I guess in larger cakes it is helpful so the cake will bake all they way through. I’m actually thinking of a 14″ round cake. There is so much on the field of the cake that I want to put, so doing a bit larger I think will be helpful!
I have been using a store bought vegan frosting (Miss Jones I think) that has just a few ingredients, so I think I will stick with that. Unfortunately where I live it’s been impossible to find vegan/plant based stick butter or shortening.
Thanks again for your help!!
Diane 🙂
My pleasure, Diane! I hope it turned out just great, and that your son enjoyed it! 🙂
Does this cake taste like coconut?
Hi Sierra! It doesn’t 🙂 The vanilla flavor is the most pronounced, and the coconut flavor gets masked. Let me know if you have any other questions!
I saw that you said maple syrup could be used instead of regular sugar for the cake batter, so would I need to use the same amount or less? Thanks
Hi Michelle! I haven’t tested the recipe in quite a while using pure maple syrup, so I honestly forgot how much to use. I believe I used 1 cup of pure maple syrup and omitted the coconut milk. The great news is, my good friend Natalie has a vanilla cake recipe that uses pure maple syrup, and I’m betting you’ll love it!: https://www.perrysplate.com/2018/09/classic-yellow-birthday-cake-chocolate-frosting-dairy-gluten-free.html
So option A is, use 1 cup of pure maple syrup and no coconut milk, or option B, make Natalie’s recipe linked above. Let me know if you have any other questions, and happy baking!