
This post may contain affiliate links. Read our privacy policy.
Creamy Roasted Garlic Hummus is the ultimate dip lover’s dream! Serve it with your choice of warm pita bread, crackers, or fresh raw vegetables for a delicious appetizer or side dish. Hummus can also be used as a sauce or spread for sandwiches, pizzas, flatbread, and more!
So you’re looking for a reliably delicious creamy hummus recipe that is silky smooth, contains traditional hummus flavor and is easy to prepare?
This Creamy Roasted Garlic Hummus Recipe checks all of the boxes for an unforgettable dipping experience.
Make it regularly to keep on hand for a healthy snack, or whip it up for guests as an appetizer or side dish.
If you’ve tried my Hummus Flatbread with Sun-Dried Tomatoes and Pesto, you know I’m also a big fan of using hummus as a spread or a sauce.
This homemade hummus recipe results in the creamiest hummus that is so much better than any store-bought hummus you’d find at a grocery store.
In my opinion, the two major keys to perfect hummus are first using the right quantity of each ingredient, and also ensuring it turns out ultra creamy by taking one extra step.
The Secret to Creamy Hummus:
There are two ways you can achieve the creamiest dreamiest hummus.
Method #1: Peel the Chickpeas.
There is an outer shell surrounding each individual garbanzo bean, which when removed can make your hummus nice and creamy. I find this to be way too labor intensive for my taste, so I found an alternate method that is much easier.
Method #2: Boil the Chickpeas Until Very Soft.
While canned chickpeas are technically cooked through, they are cooked to an al dente level so that they have a snappiness to them fresh out of the can.
For this reason, boiling canned chickpeas for 20 to 30 minutes in boiling water until they are very soft (even mushy) helps to soften them substantially. I read adding ½ teaspoon of baking soda to the water also helps soften them up and lifts the outer shell from the chickpeas easily.
After performing this step and draining the chickpeas, you’ll notice the shells come right off without any effort. I simply pick off the shells that have removed themselves from the beans and discard them. I’m fine with leaving some too so to minimize the work so I just pick off the ones that are visible and easy to throw away.
Now that we know how to make amazing creamy hummus, let’s discuss the basic ingredients list.
Ingredients for Hummus:
Chickpeas (also known as Garbanzo Beans): Pick up one 15-ounce can of garbanzo beans, or cook your own using dry chickpeas. You’ll need about 1 ½ cups of cooked chickpeas if you’re cooking your own beans, and be sure to cook them longer than you normally would, until they are very soft.
For those of us that use canned garbanzo beans, we can take the extra step of boiling the beans for 20-30 minutes with ½ teaspoon of baking soda added to the water in order to make incredible creamy hummus.
Tahini: A classic ingredient in hummus, a generous amount of tahini is used to bring rich nutty flavor to the hummus. Truly, it is a key ingredient!
Without the right amount of tahini, the texture isn’t as creamy and the flavor isn’t as pronounced. For this reason, be sure to pick up a good quality tahini and don’t skimp on the measurement. 😉
Lemon Juice: Fresh lemon juice adds a touch of acidity and citrus flavor to the otherwise creamy flavor of the hummus. You can use anywhere between 2 tablespoons and 5 tablespoons, but I personally find 4 tablespoons to be the sweet spot. For added lemon flavor, mix in 1 teaspoon of fresh lemon zest.
Water: It may seem strange, but adding a few tablespoons of cool water to the hummus not only helps blend the ingredients easily together, but it makes it light and fluffy. Don’t skip the fresh water if you’re going for creaminess.
Garlic: One large clove of fresh raw garlic is typically used in a hummus recipe like this. However, we’re taking a different approach by roasting a full bulb of garlic so that we’re getting that rich roasted garlic flavor without the sting of raw garlic.
I use about 4 cloves of roasted garlic, but you can adjust the amount according to your personal taste. Save the rest of the cloves to add to any meal recipe. Or serve the hummus with the roasted garlic nearby so that people can smear it on toasted baguette, pita bread, or crackers.
If you don’t have time to roast the garlic, simply use one large clove. After mincing the garlic finely, add it to the fresh squeezed lemon juice. This helps remove some of the burn that comes with raw garlic.
Olive Oil: A little extra virgin olive oil bring silkiness and rich flavor to the smooth hummus. Feel free to use avocado oil instead. Be sure to drizzle the finished hummus with extra olive oil for the best creamy texture.
Salt: Without the salt, your hummus will taste remarkably bland. Be sure to add it to your personal taste. I add anywhere from ½ teaspoon to 1 teaspoon of sea salt (not to be confused with iodized salt) for the best tasting result.
Now that we’ve covered the simple ingredients for hummus, let’s make it!
How to Make Roasted Garlic Hummus:
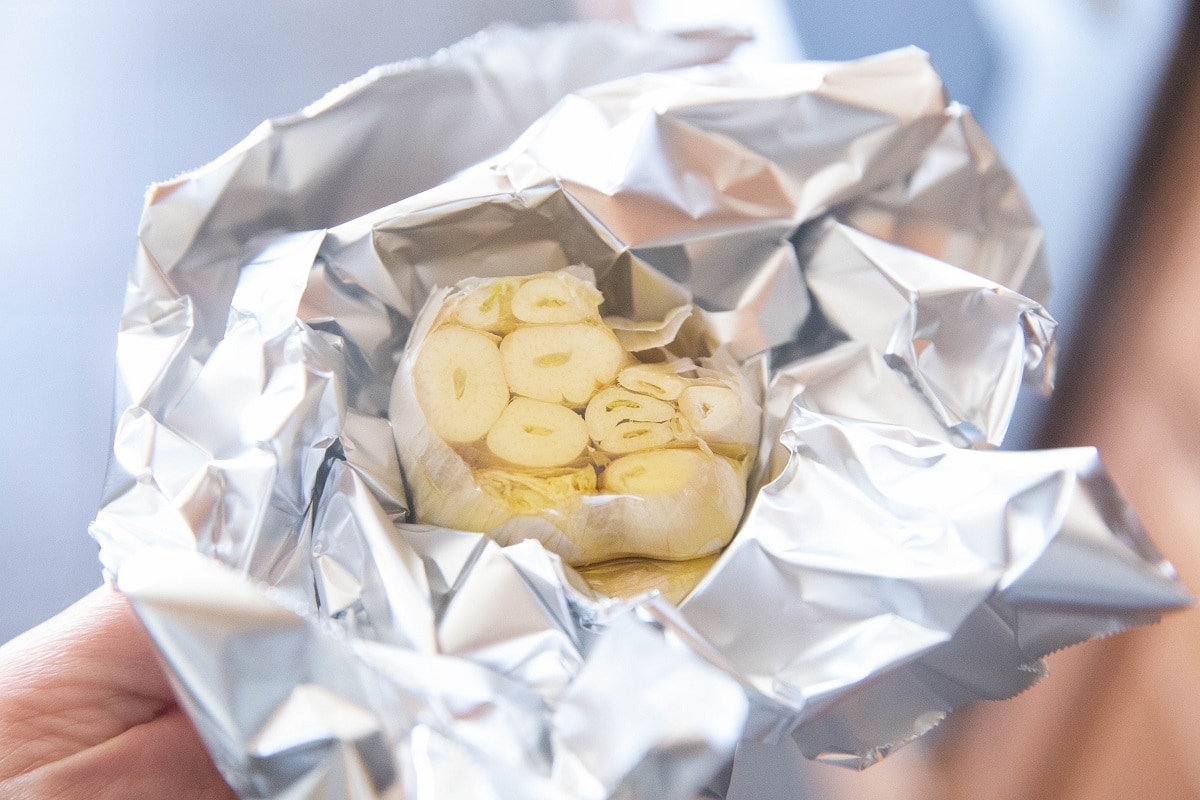
First, roast the garlic. Preheat the oven to 400 degrees Fahrenheit. Cut the top off of a bulb of garlic and place it in the center of a sheet of aluminum foil. Drizzle the top liberally with olive oil.
Wrap the bulb in foil so that it is completely enclosed and roast in the oven for 40 to 50 minutes or until the cloves are golden brown.
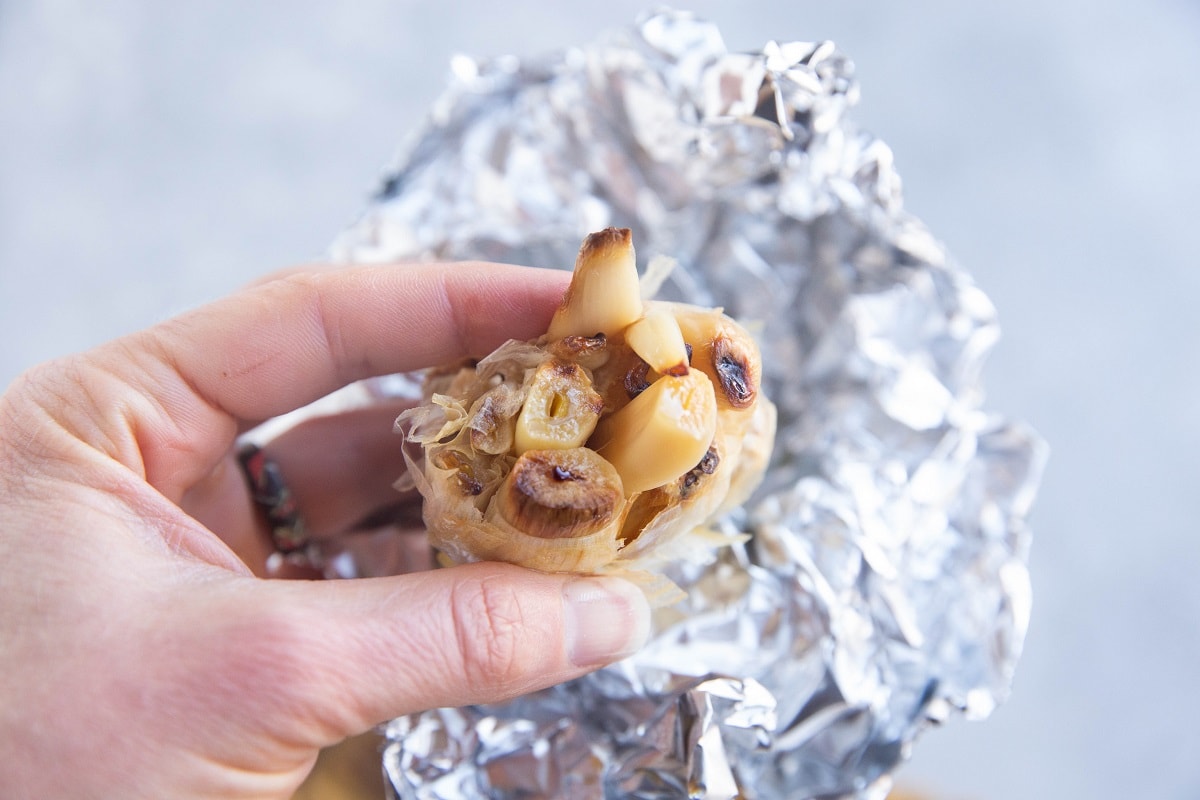
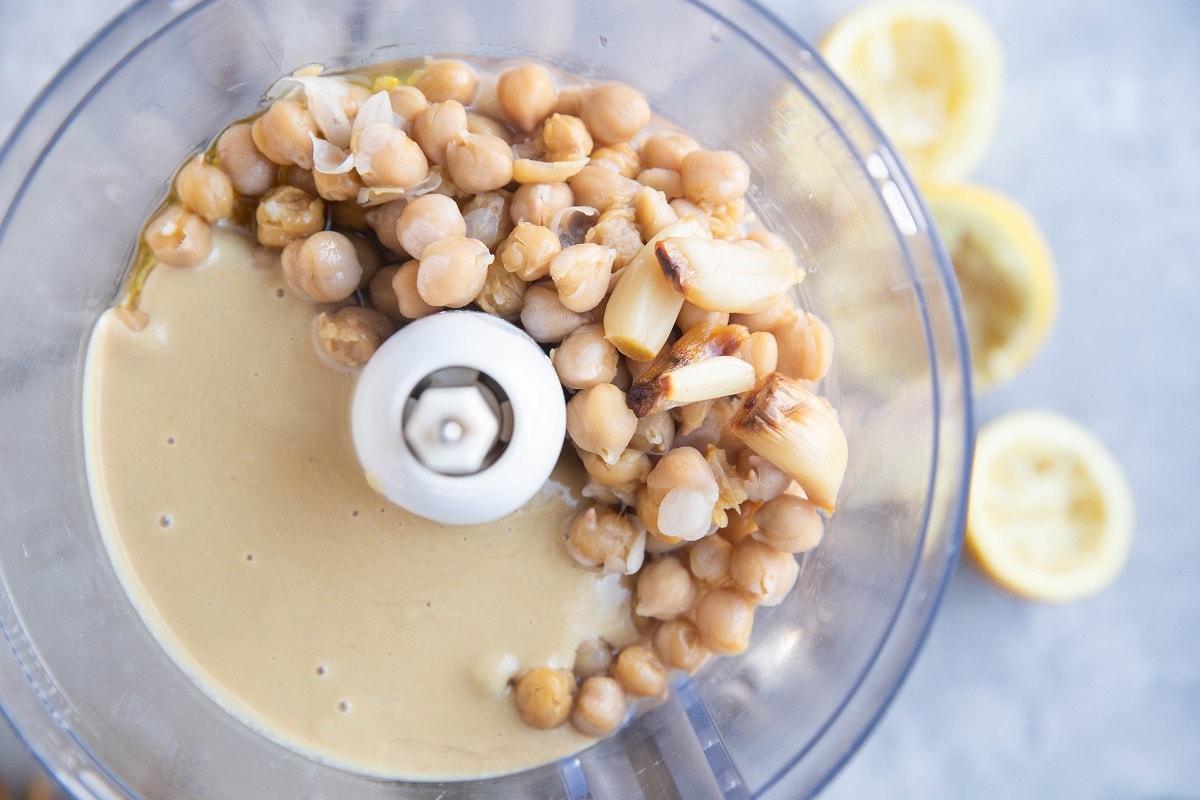
Remove the garlic from the oven and allow it to cool. Once cool enough to handle, you can gently squeeze the bottom of the bulb, and many of the individual cloves will release themselves. Use your desired amount of roasted garlic cloves in the hummus. I recommend 3 to 6 cloves. While the garlic is roasting, you can boil the garbanzo beans.
Drain the can of chickpeas into a colander then transfer it to a large saucepan.
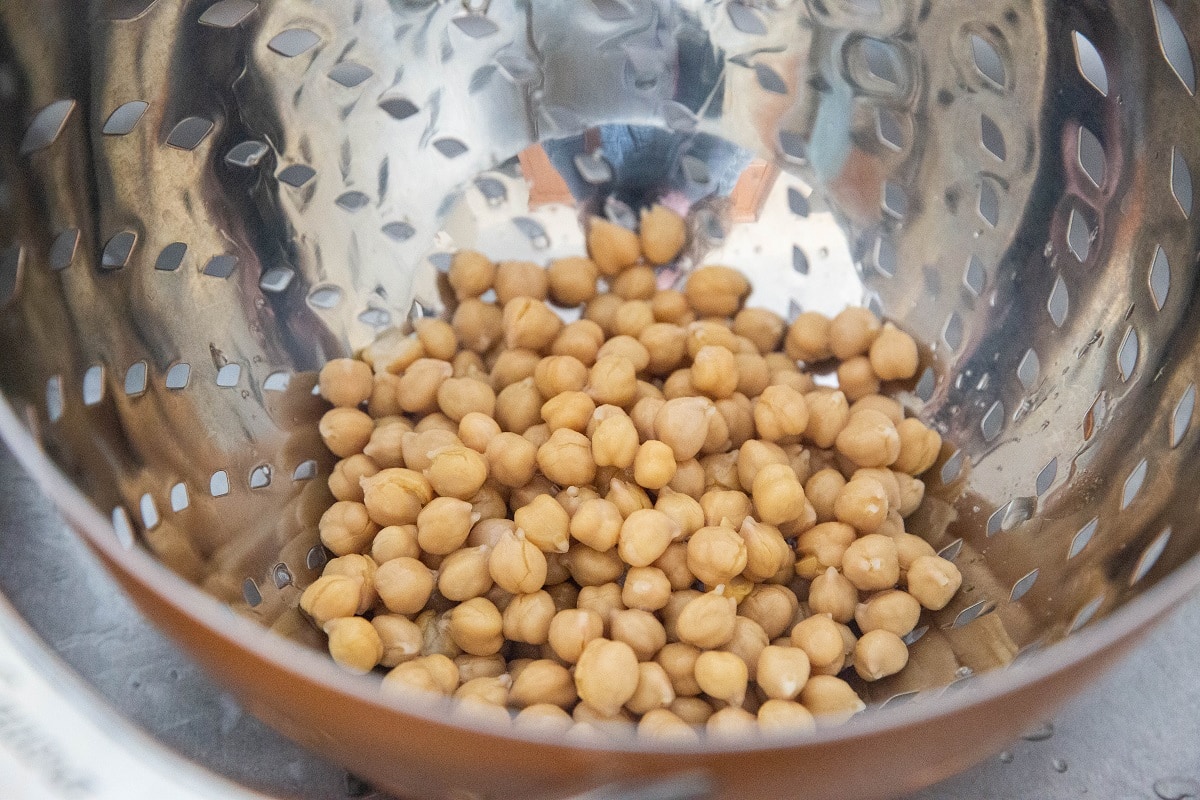
Cover the beans with water and add ½ teaspoon of baking soda. Bring the water to a full boil over high heat on the stove top and cook beans for 20 to 30 minutes.
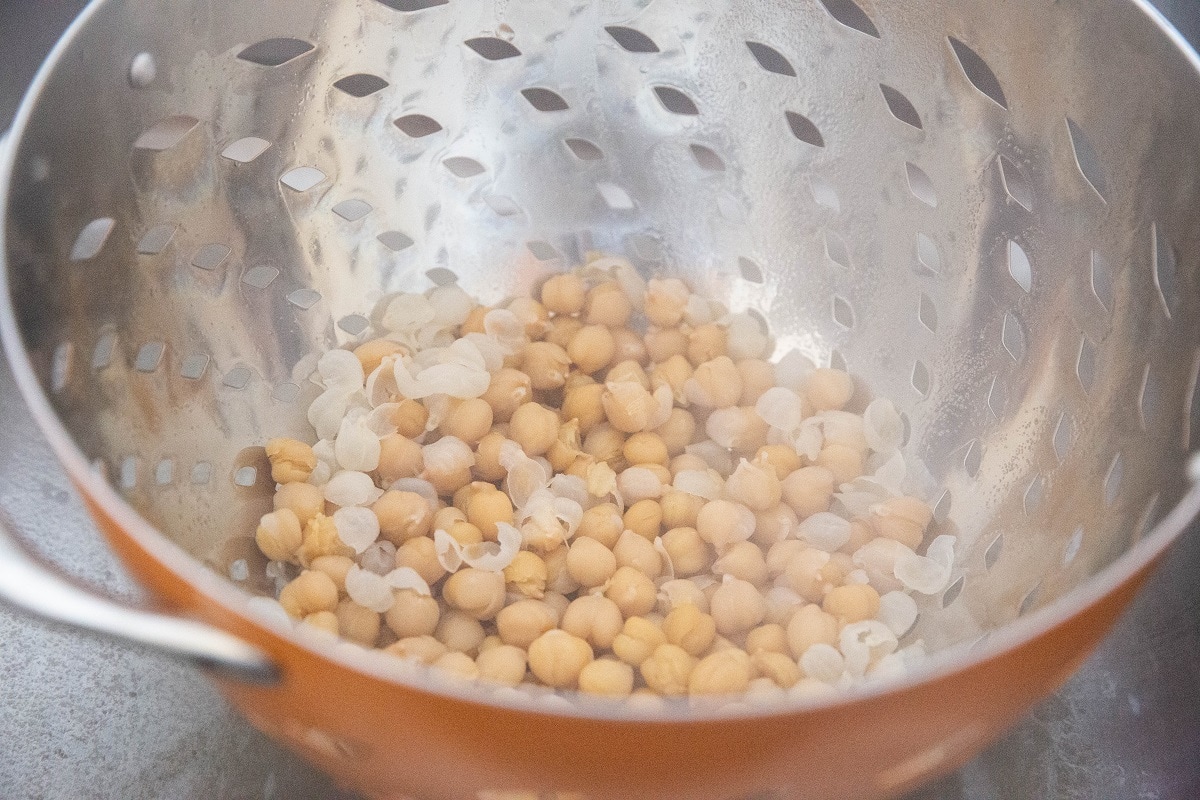
Drain the boiled chickpeas into a colander and allow them to cool. You will notice the chickpea skins have removed themselves easily from the beans. Once cool enough to handle, you can pick off the skins and discard them if you’d like.
Transfer the drained chickpeas to a food processor or high-speed blender along with the remaining ingredients for the hummus. Don’t forget to add a little water!
Process until the hummus is very smooth. If you’d like, you can stop the food processor to scrape the sides once or twice between processing using a rubber spatula.
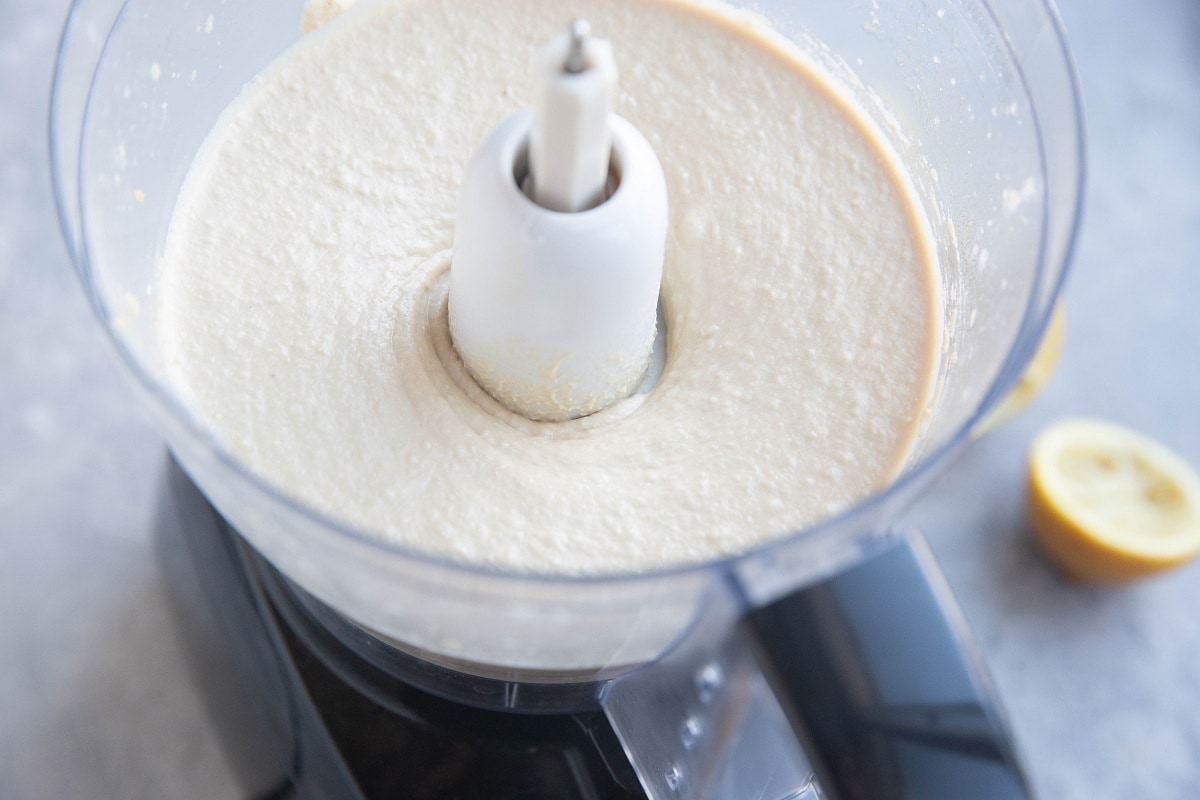
Taste the hummus for flavor and add more sea salt, lemon juice, or roasted garlic to your personal taste.
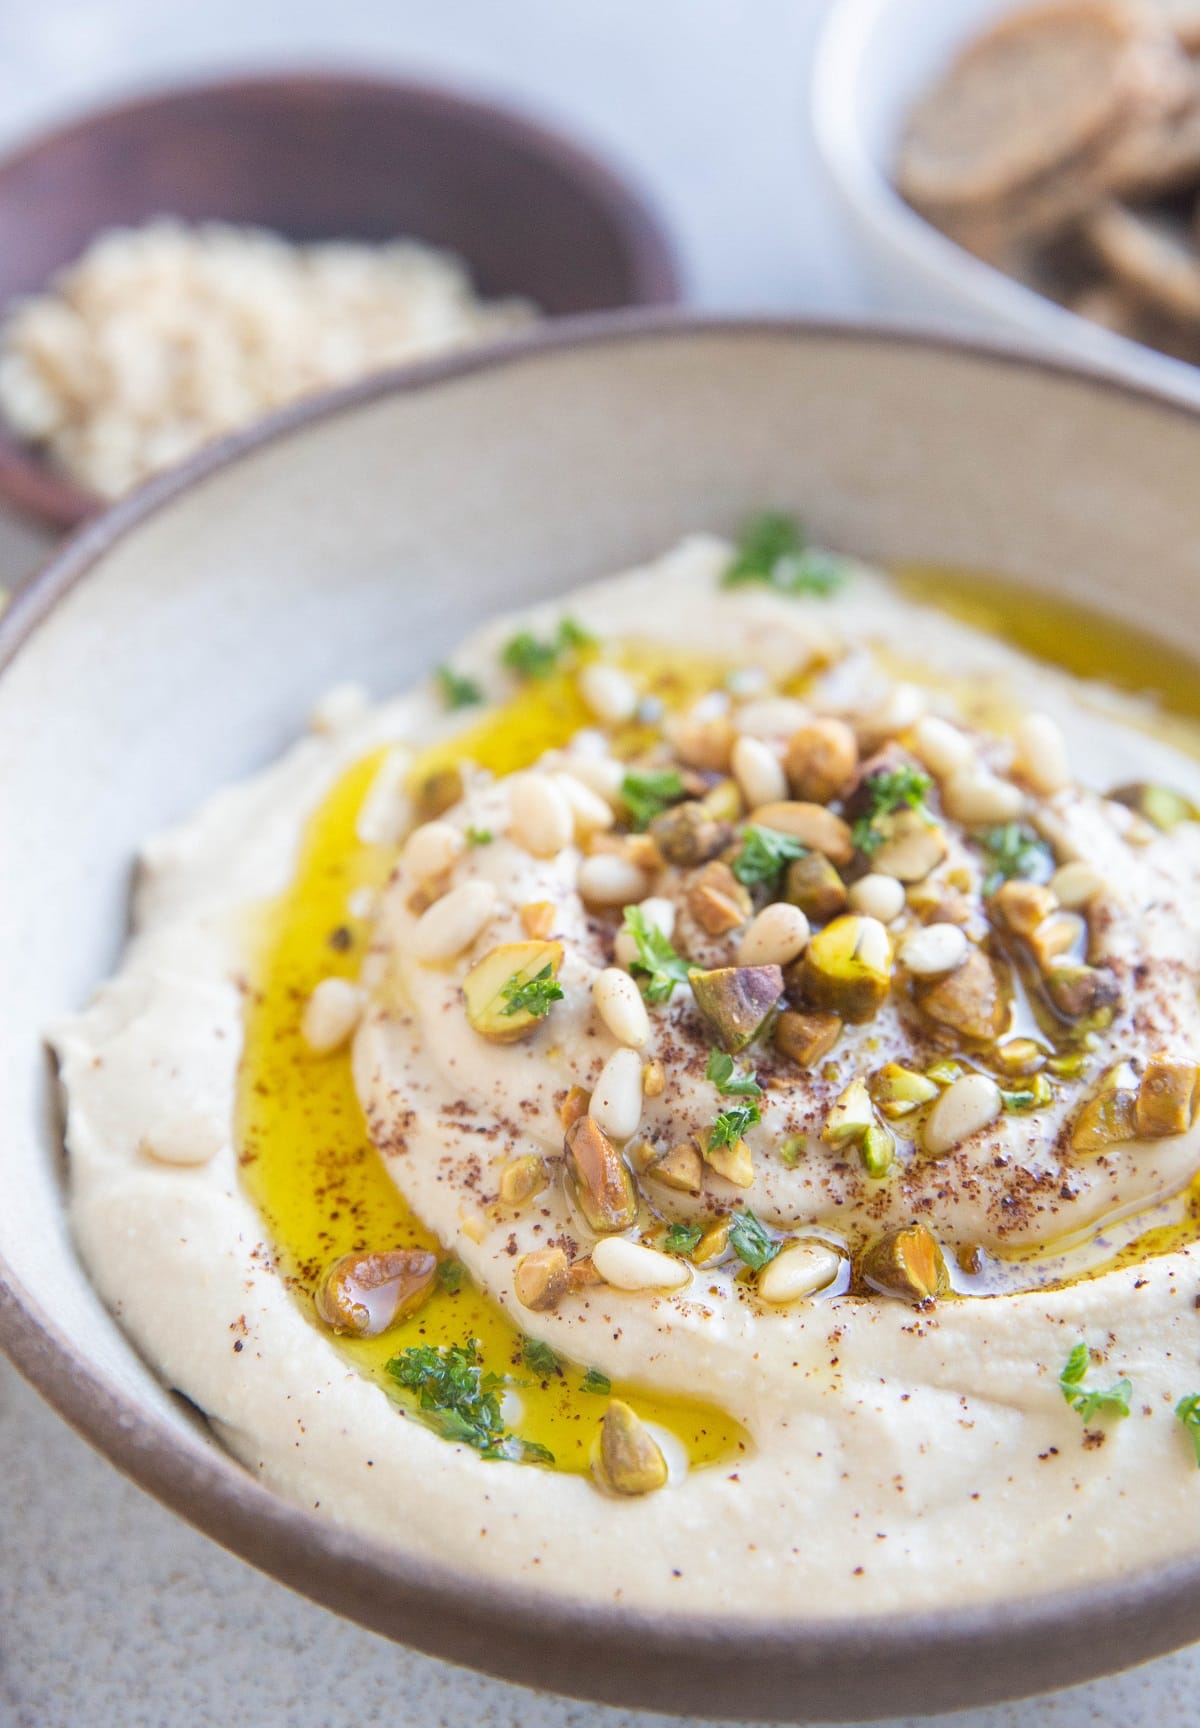
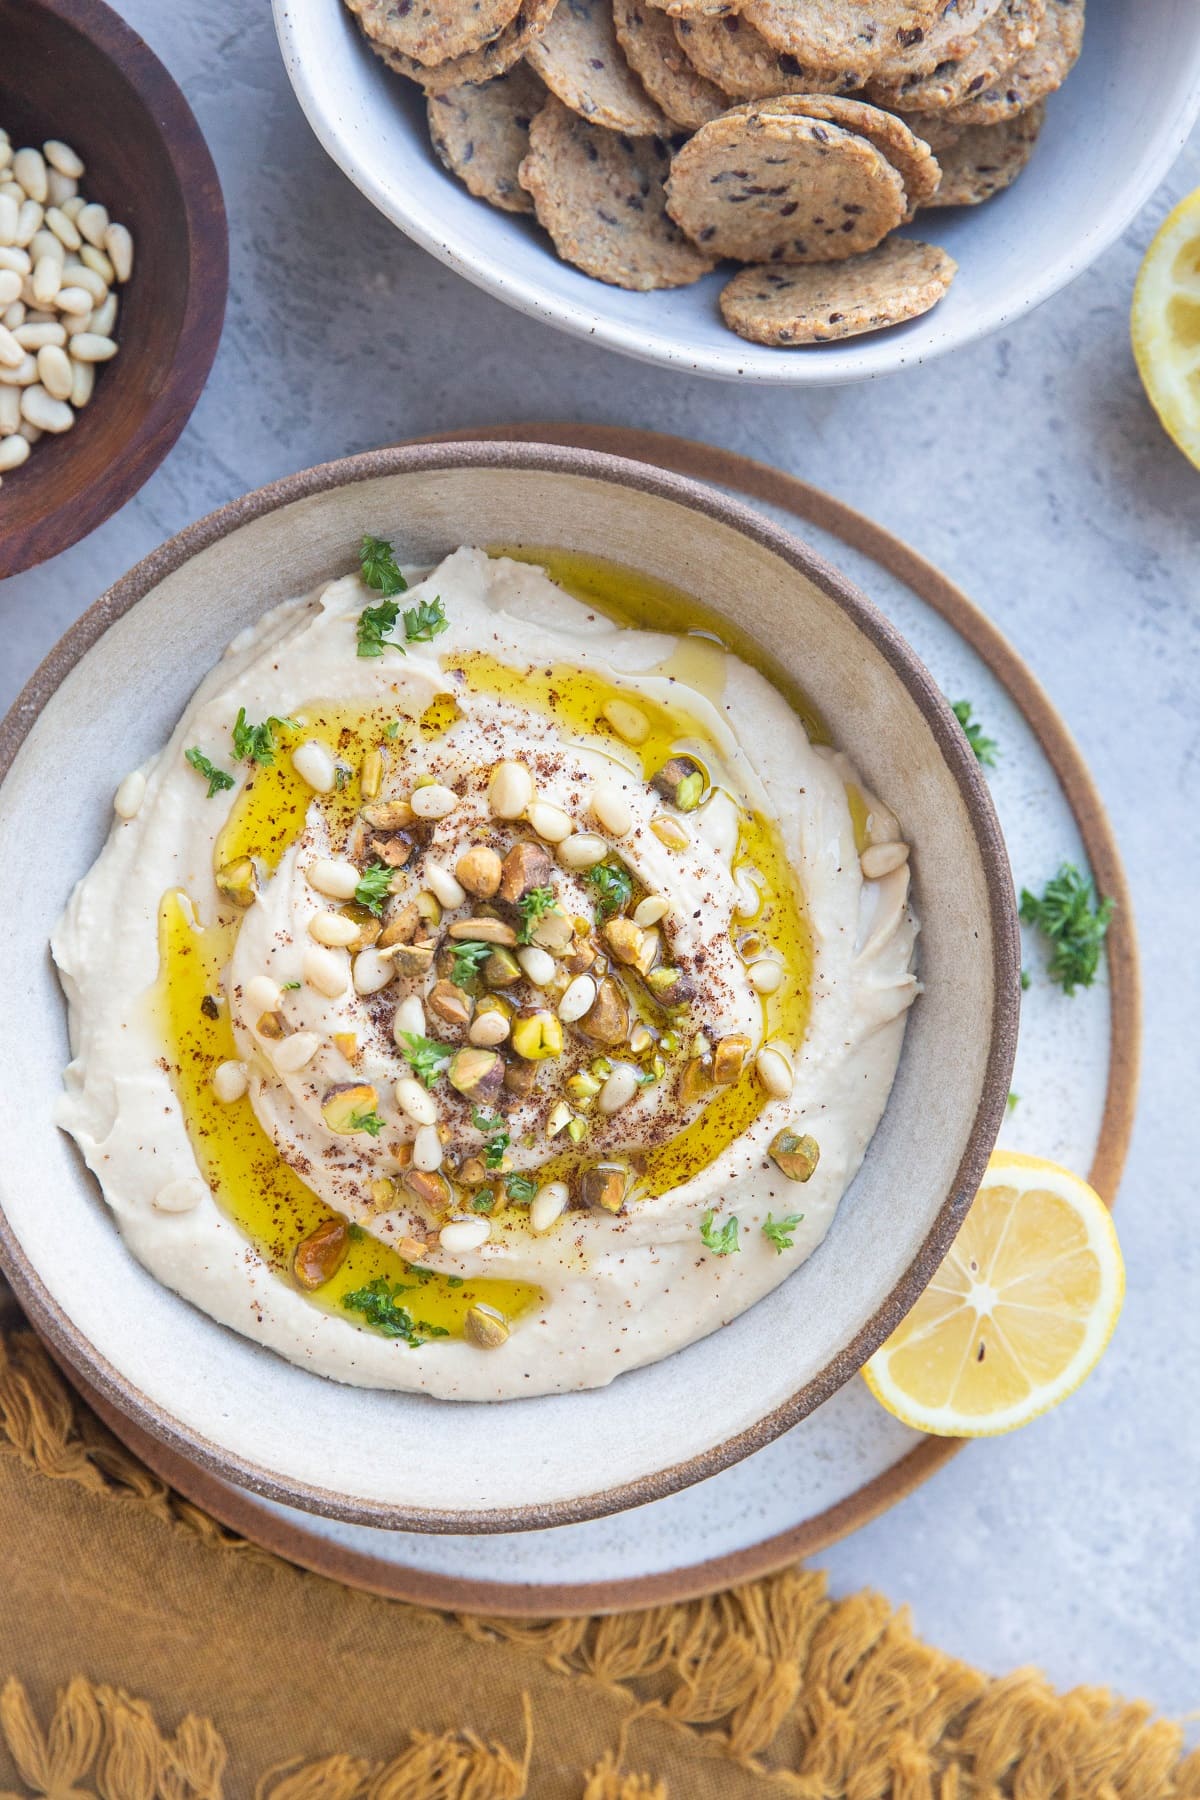
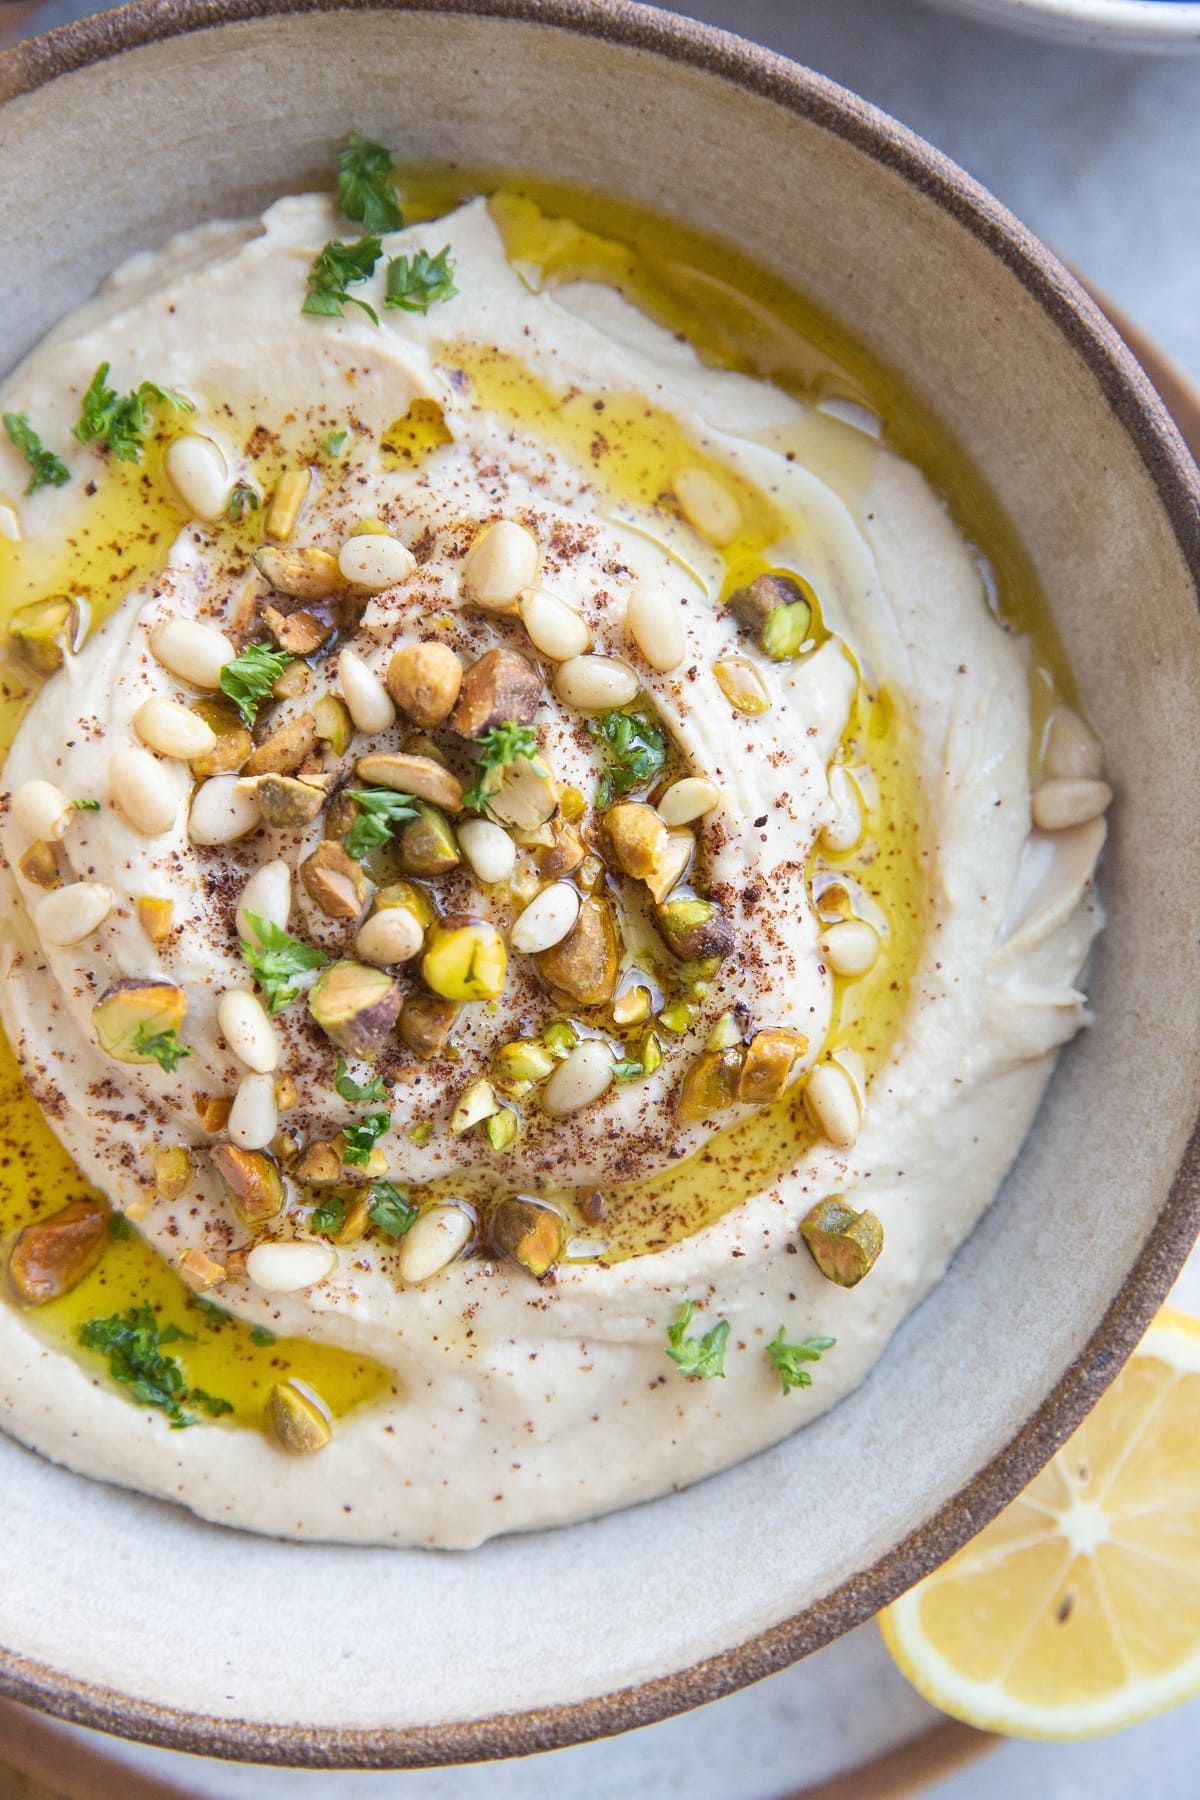
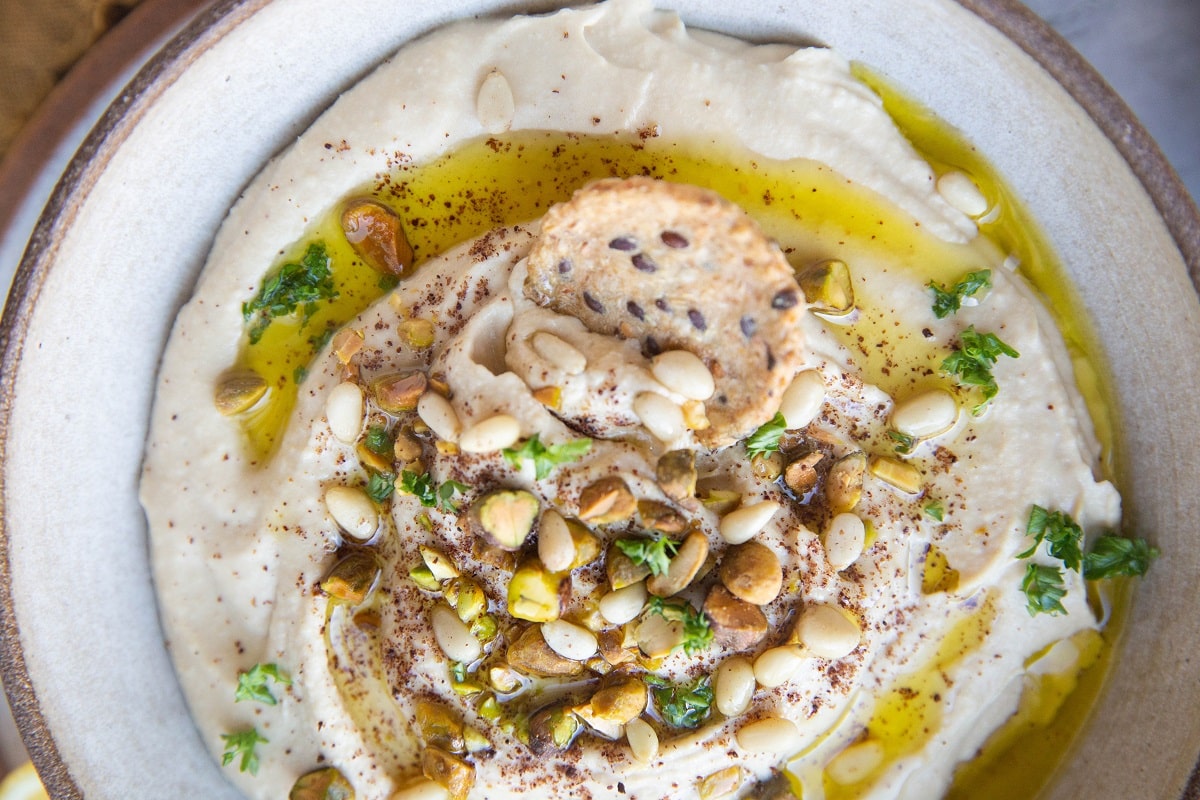
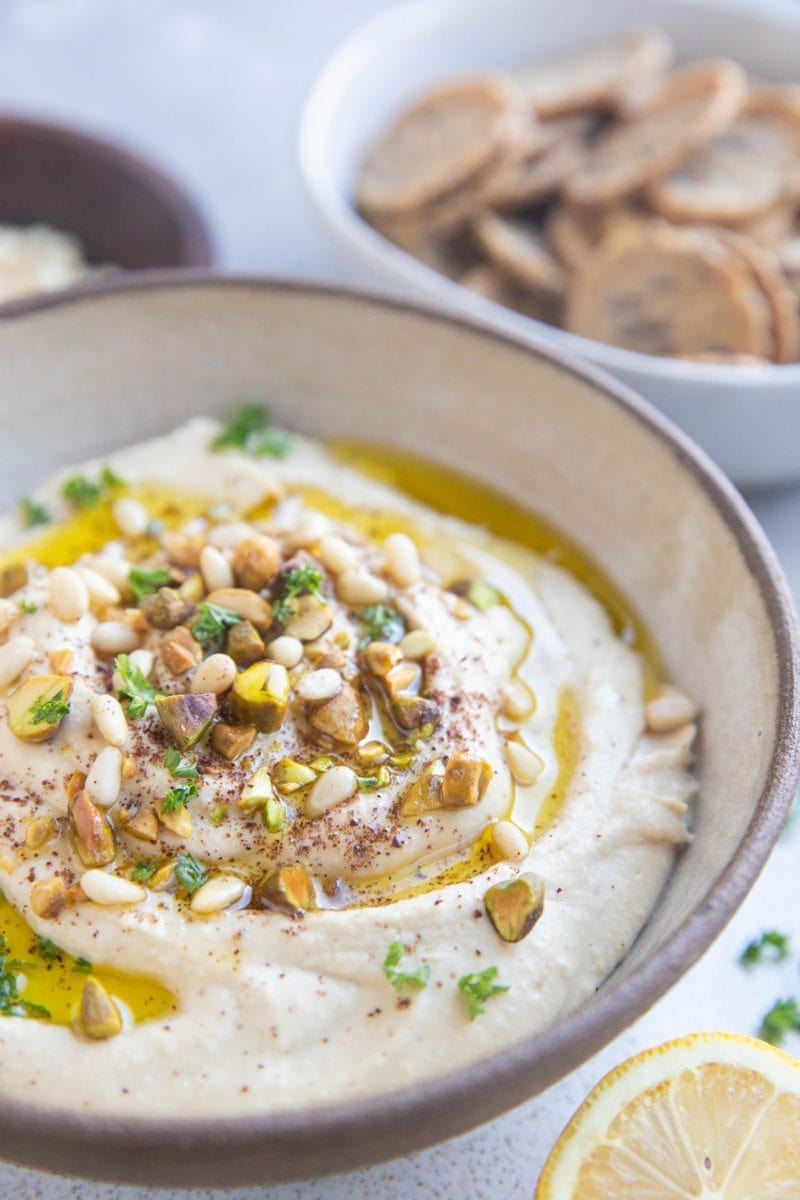
Transfer the hummus to a serving dish. Add any toppings like pistachios, pine nuts, a drizzle of olive oil, a sprinkle of paprika or sumac, sesame seeds, and fresh chopped herbs such as fresh parsley.
Serve hummus with crackers, fresh vegetables like carrots, celery, and broccoli, pita chips, or toasted bread of choice.
Store hummus in an airtight container in the refrigerator for up to 10 days.
If you’re in a time crunch, you can skip the process of boiling the chickpeas and simply add everything to the food processor. You can also skip the roasted garlic and just use one large (or two small) garlic clove.
You can also make this recipe in parts by roasting the garlic up to 5 days ahead of time and boiling the chickpeas a few days in advance.
One of the beauties of hummus is it is always more flavorful the next day (and following 2-3 days). For this reason, it’s never a bad idea to prepare the recipe in advance of when you need it.
Making your own hummus is lots of fun, not just because you end up with incredible hummus with smooth texture, but also because you can play with the flavors.
Want to change up the flavor of hummus to make it fancy? Here are some ideas!
Hummus Flavors:
- Roasted Red Pepper Hummus: Add ½ cup of chopped roasted red peppers.
- Sun-Dried Tomato Hummus: Add ⅔ cup of drained sun-dried tomatoes.
- Pesto Hummus: Add ½ to 1 cup of pesto sauce to the hummus.
- Greek Style Hummus: Top the hummus with chopped kalamata olives, cherry tomatoes, cucumbers, and feta cheese.
- Herb Hummus (Green Goddess): Add 1 cup of fresh chopped herbs, such as a combination of basil, oregano, cilantro, parsley, and mint.
- Sweet Potato Hummus: Add 1 cup of cooked sweet potato for a sweet and creamy hummus.
You can also make my Mediterranean Hummus with Pesto and Feta or my Mexican Street Corn Chipotle Hummus.
Looking for a sweet dessert hummus? Make my Vegan Double Chocolate Edible Cookie Dough which is made with black beans.
And that’s it! A delicious creamy roasted garlic hummus recipe that your friends and family will love! Mix it up using various flavor combinations to your heart’s delight!
This is the best hummus recipe for holiday gatherings, or any event necessitating yummy food. Double the recipe if you’re serving more than 6 people.
Enjoy this easy hummus recipe on, in, or around everything!
Creamy Roasted Garlic Hummus

Ingredients
Instructions
- Preheat the oven to 400 degrees Fahrenheit. Cut the top off of a bulb of garlic and place it in the center of a sheet of aluminum foil. Drizzle the top liberally with olive oil. Wrap the bulb in foil so that it is completely enclosed and roast in the oven for 40 to 50 minutes or until the cloves are golden brown.

- Remove the garlic from the oven and allow it to cool. Once cool enough to handle, you can gently squeeze the bottom of the bulb, and many of the individual cloves will release themselves. Use your desired amount of roasted garlic cloves in the hummus. I recommend 3 to 6 cloves. While the garlic is roasting, you can boil the garbanzo beans.
- Drain the can of chickpeas into a colander then transfer it to a large saucepan.
- Cover the beans with water and add ½ teaspoon of baking soda. Bring the water to a full boil over high heat on the stove top and cook beans for 20 to 30 minutes.
- Drain the boiled chickpeas into a colander and allow them to cool. You will notice the chickpea skins have removed themselves easily from the beans. Once cool enough to handle, you can pick off the skins and discard them if you'd like.
- Transfer the drained chickpeas to a food processor or high-speed blender along with the remaining ingredients for the hummus.
- Process until the hummus is very smooth. If you’d like, you can stop the food processor to scrape the sides once or twice between processing using a rubber spatula.
- Taste the hummus for flavor and add more sea salt, lemon juice, or roasted garlic to your personal taste.
- Transfer the hummus to a serving dish. Add any toppings like pistachios, pine nuts, a drizzle of olive oil, a sprinkle of paprika or sumac, sesame seeds, and fresh chopped herbs such as fresh parsley.
- Serve hummus with crackers, fresh vegetables like carrots, celery, and broccoli, pita chips, or toasted bread of choice.
Notes
Nutrition
Nutrition information is automatically calculated, so should only be used as an approximation.
Like this recipe? Rate and comment below!
This post contains affiliate links, which means I make a small commission off items you purchase at no additional cost to you.


Can I use lime juice instead of lemon?
Hi Judith! Absolutely, as long as you enjoy the flavor of lime juice! I think lime juice will taste great. 🙂 hope you enjoy!
Making this for Superbowl dip… with lots of veggies!
Wahoo! I hope you enjoy it! xoxo