This post may contain affiliate links. Read our privacy policy.
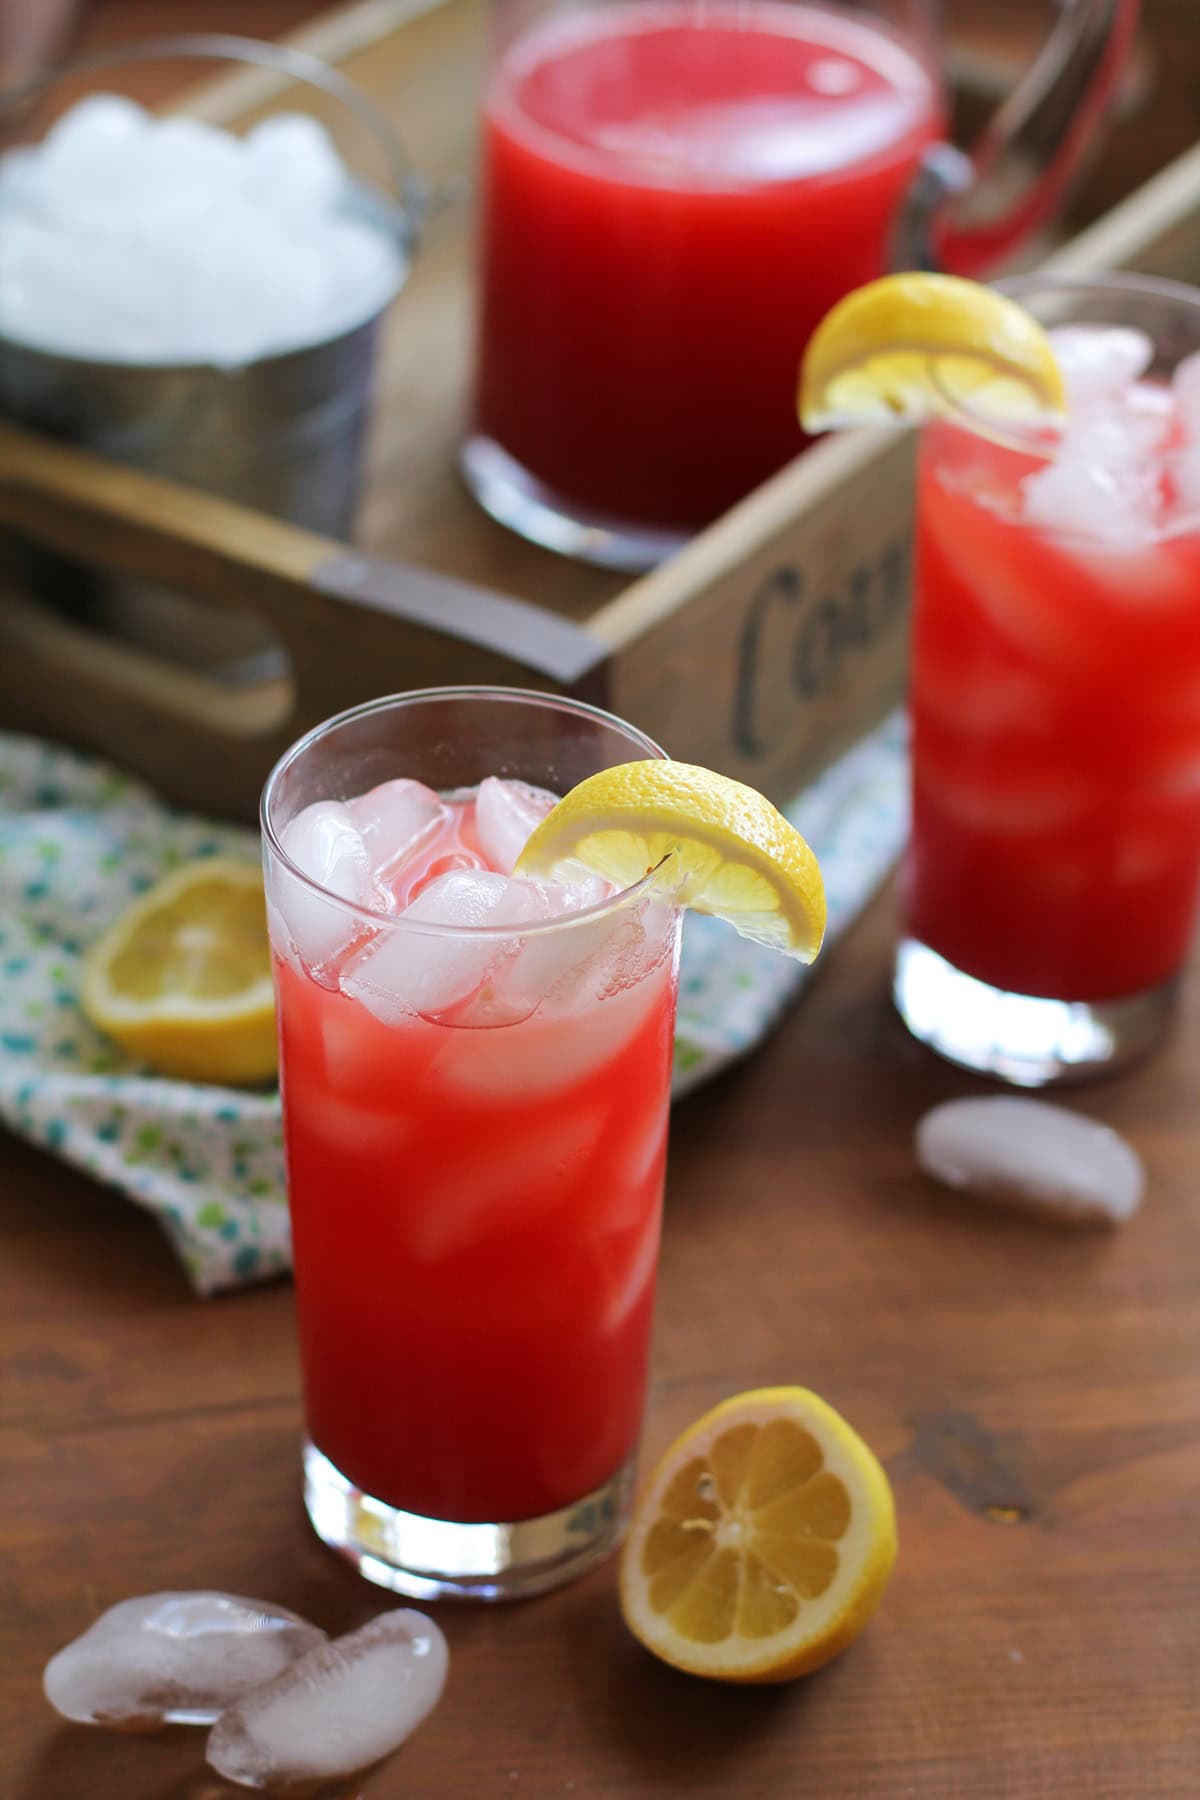
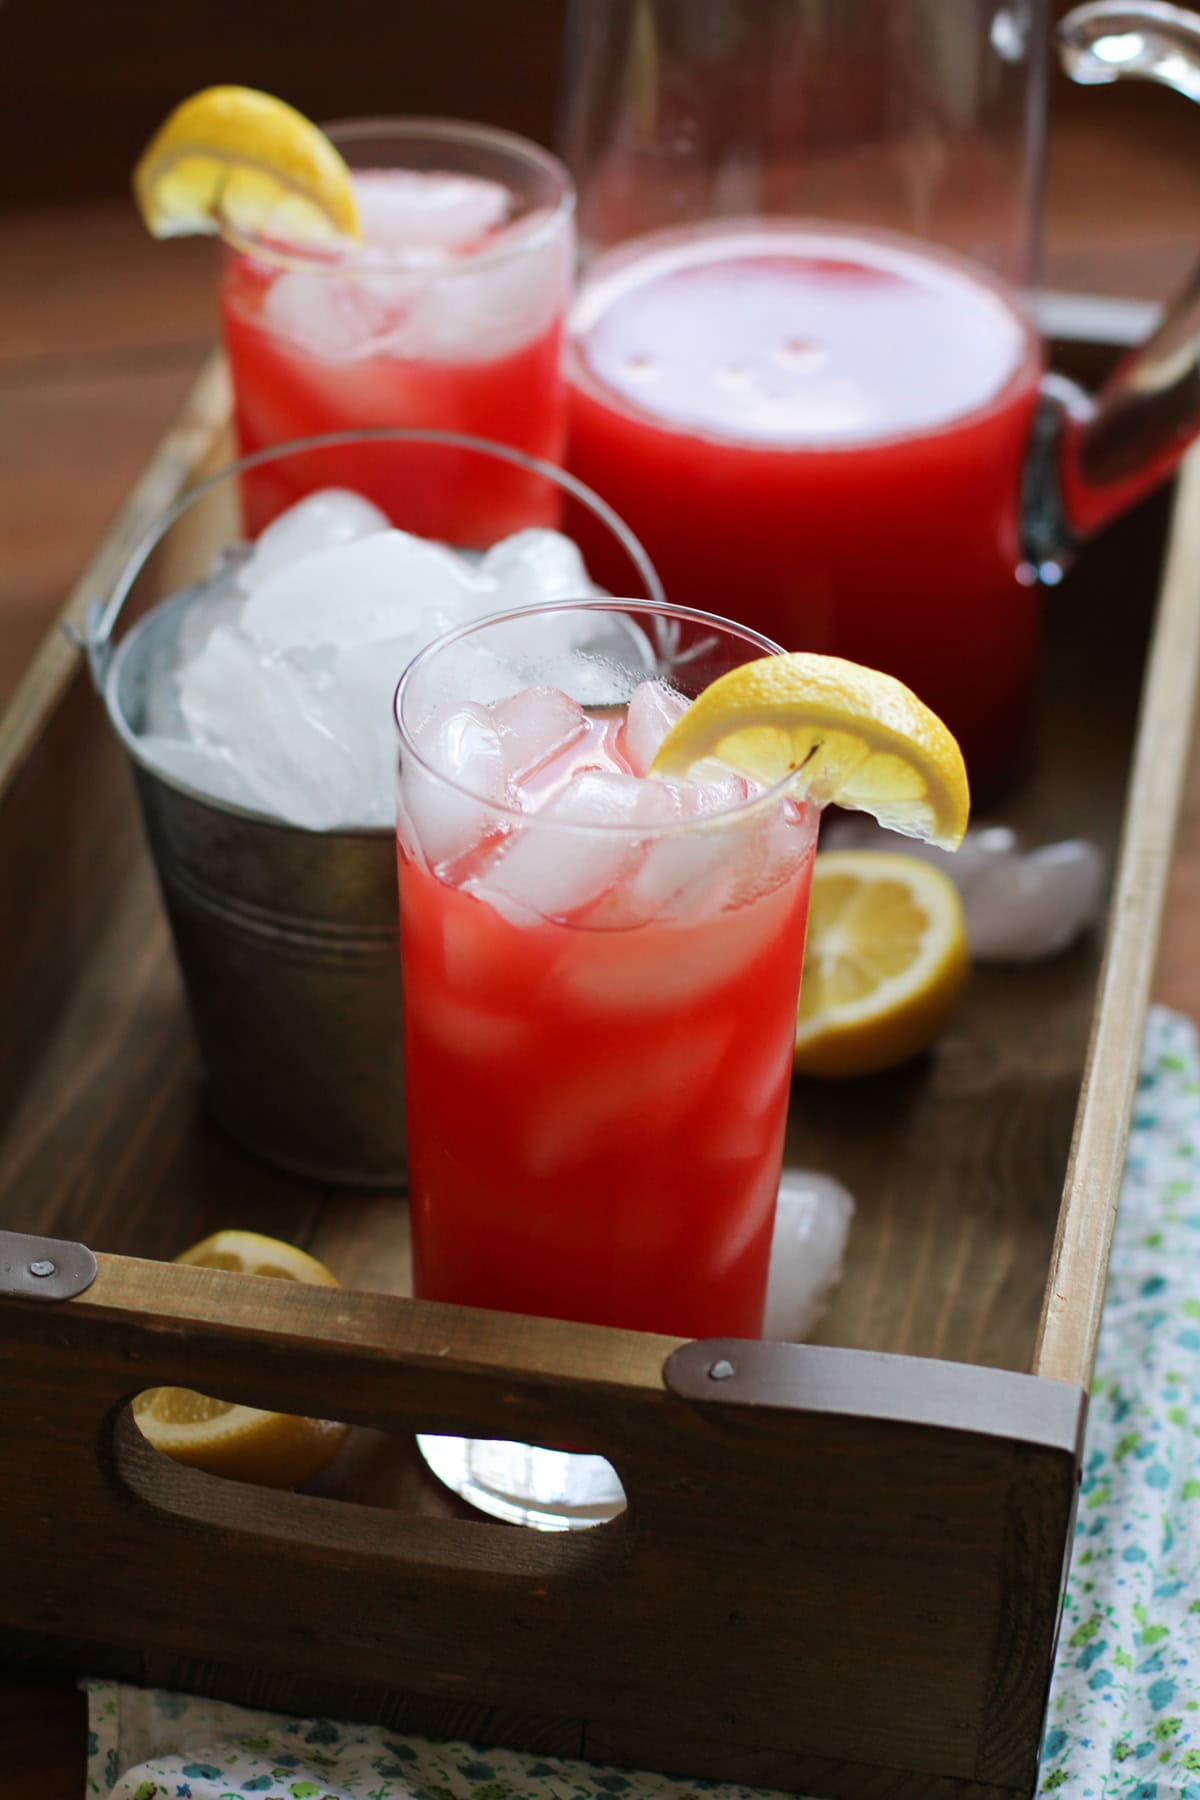
This naturally-sweetened Watermelon Agua Fresca is the kind of refreshing, no-fuss drink that makes you feel like you’re lounging on the coast. It’s hydrating, just sweet enough, and so bright and cheerful you can practically hear summer calling your name the second you pour it over ice!
Let’s talk about staying hydrated in a way that actually feels fun. I do try to love plain water, but sometimes I want something that feels a little more exciting than a cold glass of “meh.”
At some point down the line, I began buying zero calorie flavored waters from the grocery store, but my occasional water treat turned into a daily habit.
By happenstance, I figured out a great way of weaning myself off of the store-bought waters: Agua Fresca, but of course!
I had picked up a personal-sized watermelon (no joke, that’s what the sign said at the grocery store), hacked it up, then immediately realized I was craving the juice.
Why You’ll Love This Recipe:
Hydrating – Watermelon is basically nature’s sports drink. It’s naturally sweet, full of electrolytes, and blends up into the most gorgeous ruby-red juice that just screams “drink me!”.
Zesty – Add a squeeze of citrus, a touch of natural sweetener if you need it, and a pinch of sea salt (trust me!). Suddenly, you’ve got a drink that tastes way more special than the 5 minutes it took to make.
Versatile – Aguas frescas are the perfect companion for a hot summer day, dinner parties, lazy backyard summer barbecue, or those moments when you want something refreshing that isn’t loaded with sugar. Pour it into a fancy glass, add a wedge of lime, and you’ve basically created vacation vibes out of thin air.
Let’s discuss the simple ingredients for this delicious drink!
Ingredients for Watermelon Agua Fresca
Fresh Watermelon: Juicy, sweet, and hydrating. A ripe seedless watermelon is the backbone of this recipe. It gives you big flavor without needing much (or any) added sugar.
Cold Water: Helps thin out the watermelon purée into a perfect crisp beverage. Use more or less depending on how strong you like the flavor.
Fresh Lime Juice or Lemon Juice: Adds brightness and makes the whole drink pop. A little citrus goes a long way here.
Maple Syrup or Agave Nectar: Only necessary if your watermelon isn’t naturally sweet enough. A tablespoon is usually plenty.
Sea Salt: Just a pinch helps bring out the flavor and adds a subtle electrolyte boost. It’s great on hot days.
Recipe Customizations
- Fresh herbs like fresh mint leaves or basil for a great addition!
- Mix in cucumber if you want a spa-style version!
- If you’re a fan of sparkling water, replace part of the still water with sparkling for a fizzy agua fresca.
- Make it a “mocktail” by adding ice, sparkling water, a squeeze of lime, and a salted rim! Hey, we’re not afraid to be bougie around here.
- Add in other fresh fruit, like berries, or make the agua fresca using honeydew or cantaloupe.
- For a sweeter drink, add in a little sugar or simple syrup.
Helpful Tips
- Use super ripe watermelon. The sweeter the melon, the less added sweetener you’ll need.
- I highly recommend using a mesh strainer here as I like my agua fresca ultra-smooth. Some people like a little pulp, others don’t. Totally your call!
- Chill before serving. Agua fresca tastes even better after an hour in the fridge. Trust me on that one.
- Batch friendly! You can easily double or triple it for parties.
How to Make Watermelon Agua Fresca
Start by chopping your watermelon. Place it on a cutting board and cut watermelon into cubes with a sharp knife, discarding the rind. Add the chunks of watermelon to a high speed blender.
Pour in a little cool water to help everything blend smoothly, then blend on high until the mixture is completely liquefied.
Set a fine mesh strainer over a large pitcher and pour the blended watermelon puree through it for smooth pulp-free watermelon juice. You can use the back of the wooden spoon to press the pulp into the fine mesh to get out as much watermelon juice as possible.
Press down with a spoon to extract all the juice while leaving the pulp behind. If you like a thicker drink, feel free to skip straining altogether!
Stir in the remaining cold water until it reaches the strength you like.
Add fresh lime or lemon juice, then taste and decide if you want a touch of maple syrup or agave for sweetness.
Finish with a pinch of salt. Stir well, then chill the agua fresca in the refrigerator or pour it over plenty of ice.
Serve with lime wedges and fresh mint sprigs, and enjoy!
Store leftover watermelon water in an airtight container or a jar in the refrigerator for up to 5 days.
I seriously can’t get enough of how refreshing this Watermelon Agua Fresca recipe is. It’s what I reach for when I want something hydrating, fruity, and wildly easy to prep.
It is a lovely drink to enjoy on a daily basis, and perfect for any summer dinner party too! Enjoy it on the next sunny day when the hot weather has you feeling thirsty!
If you love refreshing beverage recipes, also try these reader favorites.
More Drink Recipes
- Apple Cider Cocktail
- Dairy Free Horchata (Naturally Sweetened)
- Chocolate Peanut Butter Chia Seed Smoothie
- The Best Vegan Eggnog
- Copycat Gingerberry Kombucha
Watermelon Agua Fresca

Ingredients
- 6 cups chopped seedless watermelon
- 2 cups to 4 cold water, to taste
- 1 tablespoon lemon juice, or lime
- 1 tablespoon agave nectar or pure maple syrup
- 1/4 to 1 tsp sea salt, optional*
Instructions
- Add the chopped watermelon to a blender and blend until smooth. Strain watermelon juice through a fine mesh strainer into a large pitcher. Use your fingers to press the watermelon pulp through the strainer in order to get as much of the liquid out as possible. Discard the watermelon pulp (or perhaps use it in popsicles?).
- Add the remaining ingredients to the pitcher, stir, and serve over ice. Note: You can adjust the amount of added water, lemon juice, and sweetener to taste.
Notes
Nutrition
Nutrition information is automatically calculated, so should only be used as an approximation.
Like this recipe? Rate and comment below!
I shared this recipe on July 18, 2015. On January 14, 2026, I added ingredient notes, customizations, updated the photos, and included helpful tips.